Drilling the Threading Points
Presentation
 | Automatic creation of holes according to the threading points created. These holes are machined with automatic machining in the milling environment. |
Note: this function is useful only if you are the owner of a milling licence, else you will not be able to machine the holes entities.
In that situation, the workaround is to export the 'Drill Table' sheet in the workshop documents to get the coordinates of holes and drill them manually.
Creating the threading drillings
Click on the function
By default only 1 operation of drilling will be associated to the holes; if you want a jig boring to be done, check the corresponding box in the dialogue zone.
Validate with the green tick
The list of the threading points is displayed in a table. If the threading point is created manually or if there is a problem on the calculation of the threading point, the diameter and depth are displayed with ???.
Warning: if the threading point was created manually during the selection, no depth nor diameter are associated, consequently no hole is created !
Drilling the threading points
Save the part
Exit the EDM environment
Enter the Milling Environment
Go to Milling then menu Holes and choose automatic. Choose the type of optimization (often by plane) and launch the calculation.
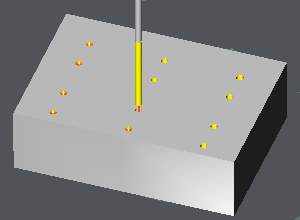
Here is an example of EDM part. | Drilling of the threading point |
 |  |
