Skip table of contents

Techno Tables

Techno tables refer to predefined sets of machining parameters that help optimize the cutting process for different materials and conditions. These tables contain information such as:

  • Cutting speed: The rate at which the wire cuts through the material.

  • Wire feed rate: How fast the wire is fed through the machine.

  • Electrical settings: Parameters like voltage, current, and pulse duration.

  • Flushing pressure: The pressure of the dielectric fluid used to flush away material debris.

  • Surface finish requirements: Specified roughness or smoothness based on the application.

Techno tables streamline the setup by allowing operators to select appropriate settings quickly based on the material, thickness, and accuracy needed.

Techno tables are directly linked to the machine. Hence, each machine manufacturer has its own set of techno tables.

Below are the contents on how to implement techno tables in GO2cam.

Creation of techno tables

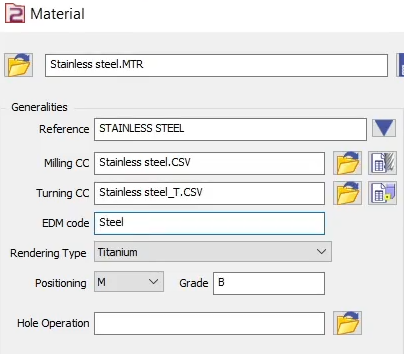
Load the machine file.

The first step to be able to define a techno table is to load or create a machine. The file extension is .MCE

Define the material.

  • Right-click on it and edit.

  • Select the material.

  • In the EDM code field, type the material name , for example Steel, to define the material to be used in the techno table. Apply and save the material.

EDM code field - material.PNG

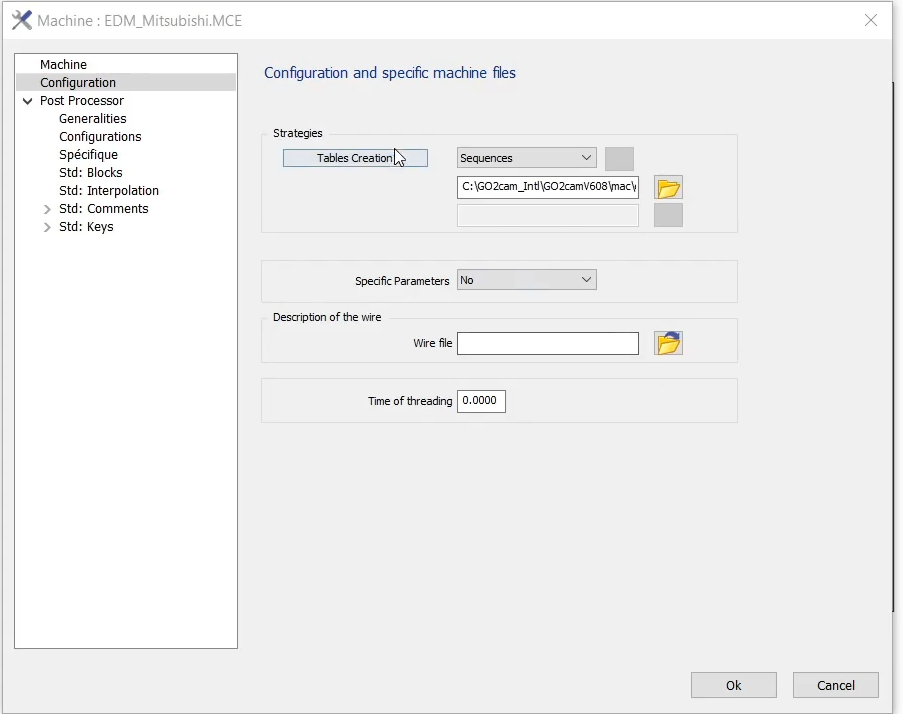
Machine configuration.

  • Edit the machine and navigate to the configuration section.

  • Select "Sequences" from the strategies drop-down list.

  • Define the file directory where the tables will be saved.

  • Select the folder.

  • Click on the "Tables Creation" button to open a window for the definition of the techno tables parameters.

image-20240912-065354.png

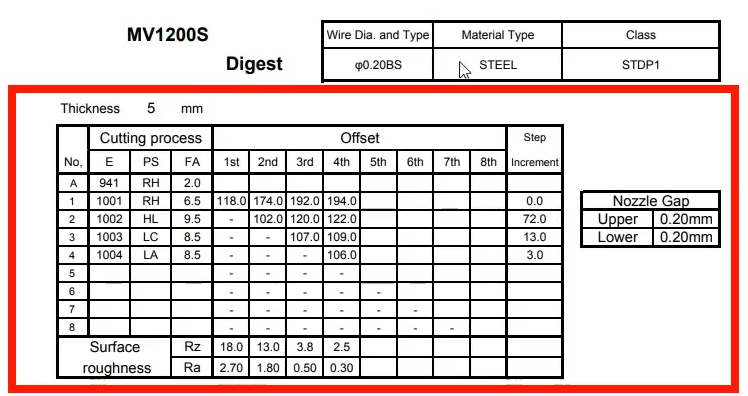
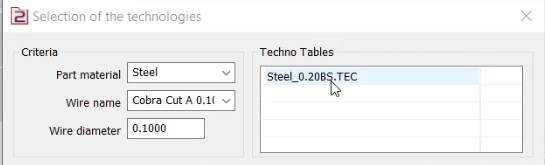
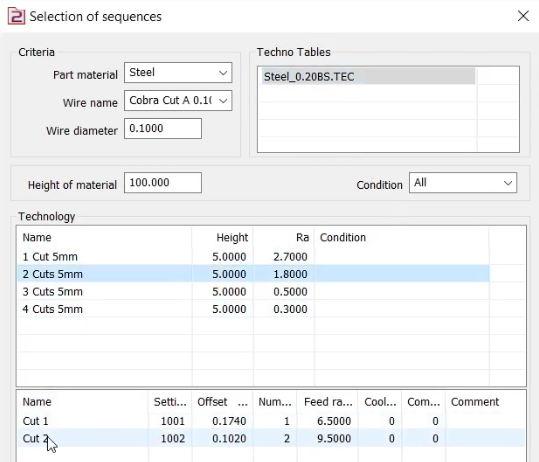
In the Selection of the technologies window:

  • To create a new techno table, right-click in the Technology area and select Add. A new row is added.

  • Take reference from the manufacturer’s data book to insert the relevant parameter. for example Mitsubishi. A techno table for each type of wire, material, class and material thickness is provided.

manufacturer table.PNG
  • Setting number is defined in column E, advance feed in column FA, offset value for each number of cuts and surface roughness value at the bottom.

  • Input the required parameters based on the manufacturer table.

image-20240912-065254.png

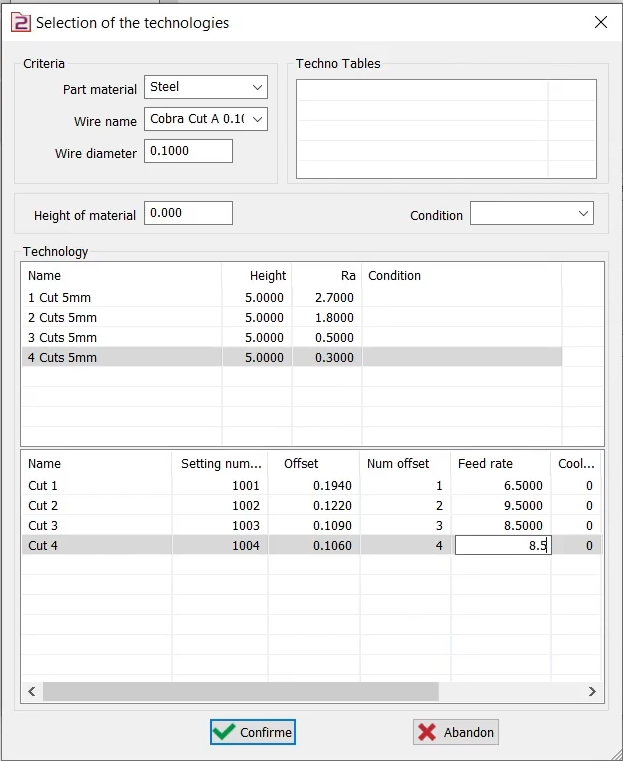
The first space under Technology is for setting the cuts. The second table downward is used to define other parameters for each cut, such as the feed rate and offset.

After all the values have been inserted, confirm and give a name to the file.

This file is now available in the Techno Tables field.

Repeat the process to define more techno tables.

image-20240912-070557.png

▶️ You can find a full detailed guide on the creation of Techno tables in this video.

Creation of techno tables-20240912-095134.png

Using Techno Tables

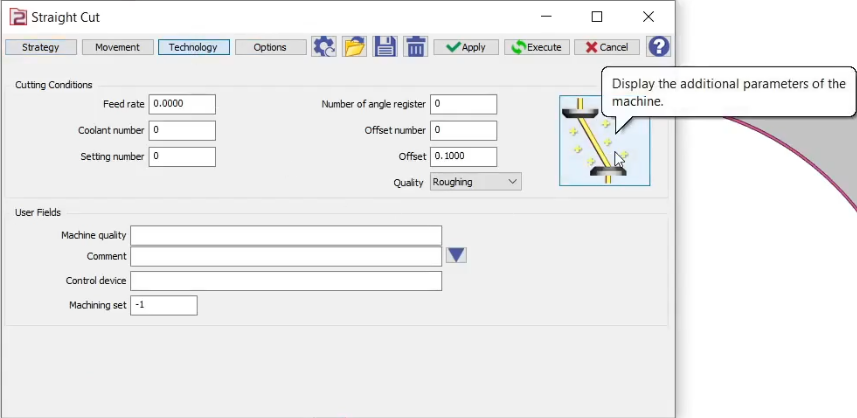
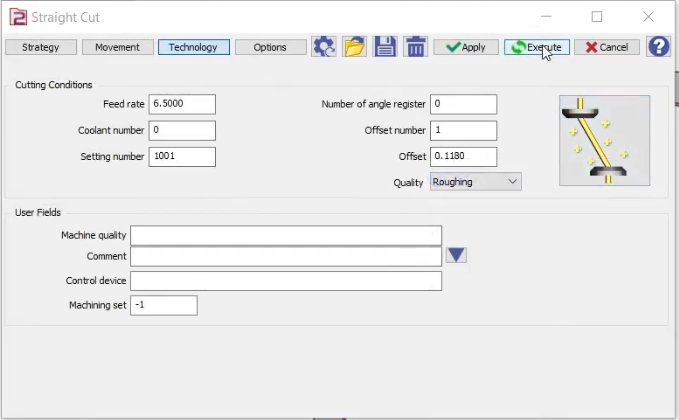
Method 1: Application on each cycle

Access Configuration:

  • Open the machine file.

  • Navigate to the configuration section.

  • Verify that the correct directory for the Techno Tables is specified.

Select Machining Cycle:

  • Expand the machining cycle options.

  • Double click on the strategy to open it

  • Go to the technology tab.

  • Click on the wire image located on the right side of the interface

image-20240912-101145.png

  • In the following window, choose the Techno Table you've created.

  • Select a specific technology within that table and confirm.

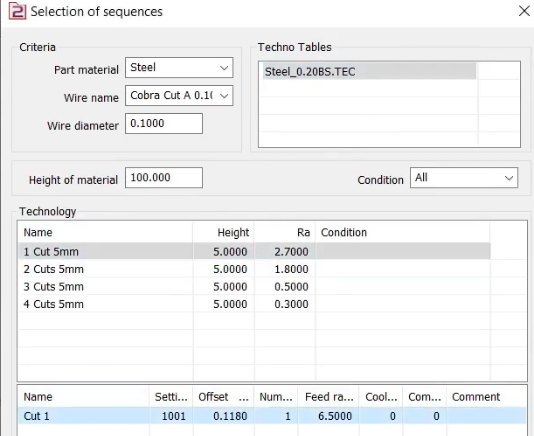
The window is similar to the ‘Selection of the technologies' window. But this is used to apply the defined technologies to a cycle and is titled 'Selection of sequences’.

image-20240912-101607.png

  • In the Technology window, observe that the cutting conditions have been automatically updated based on the selected Techno Table.

  • Click the "Execute” button to validate these changes and proceed with the machining process.

image-20240912-101532.png

▶️ You can find details of the 1st method of how to use the techno tables in this video

1st Method to use Techno tables-20240912-095015.png

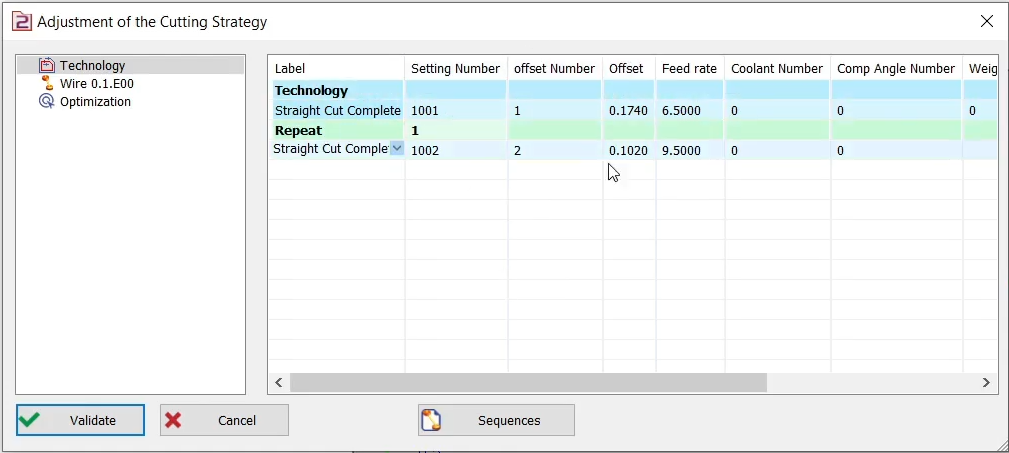
Method 2: Application by strategy
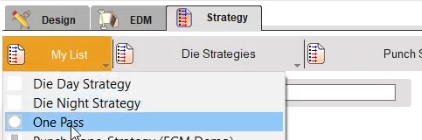
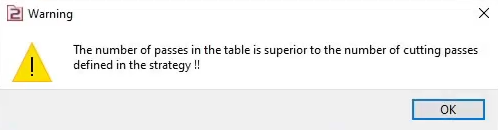
  • Open the machine file.

  • Navigate to the configuration section.

  • Verify that the correct directory for the Techno Tables is specified.

  • Navigate to the Strategy tab.

  • From the available list, choose the desired strategy (e.g., One Pass Strategy).

image-20240912-114139.png
  • A window will appear where you can select the Techno Table you've created.

  • Select the required technology and Confirm.

image-20240912-114025.png
method 2 warning.PNG
  • A warning may pop up if the number of passes in the techno table is greater than that defined in the strategy. Click on OK

  • The Cutting Strategy window will open. The number of cutting passes is automatically adjusted by GO2cam as per that of the techno table. Other parameters are also automatically filled based on the selected techno table.

  • Validate Cutting Strategy

  • Select the geometry on the workpiece.

  • Calculate and validate the EDM strategy.

image-20240912-113738.png

Cutting Strategy window

Verify Parameters:

  • Right-click on Machining in the machining tree and open the list of operations.

  • Choose "Technology" from the dropdown list.

  • Verify that the parameters applied earlier in the Techno Table are accurately reflected in the current operation.

image-20240912-114845.png

List of Operation

▶️ You can find details of the 2nd method of how to use the techno tables in this video

2nd Method to use techno tables-20240912-095105.png

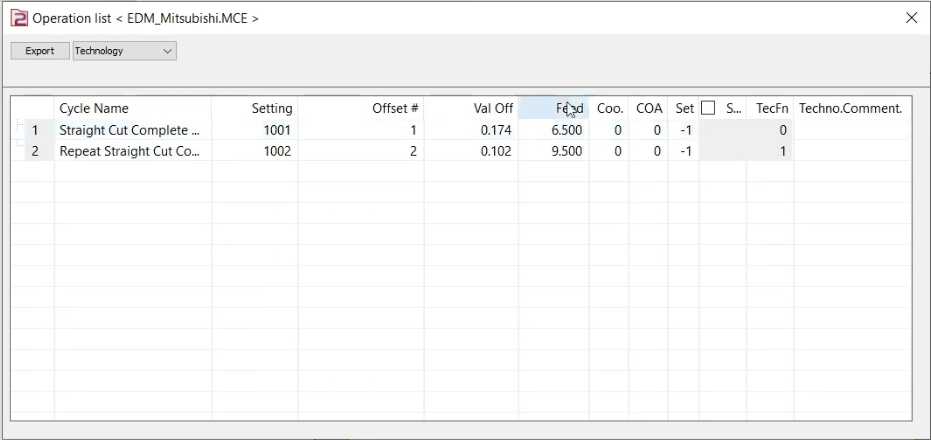
Manufacturer Techno Tables

GO2cam is able to manage techno tables from many manufacturers. The process to include the parameters and define the techno tables in the software is the same for all different manufacturers. Some example of EDM machine manufactures are:

  • AgieCharmilles

  • Makino

You can download some examples of techno tables on the right.

Makino Manufacturer Techno tables.zip

  • Mitsubishi

You can download some examples of techno tables on the right.

Mitsubishi Manufacturer Data book.zip

  • Sodick, and more…

JavaScript errors detected

Please note, these errors can depend on your browser setup.

If this problem persists, please contact our support.