

|
Creation of helix geometry. The entity created is a single curve. |
Creation of Helix
The dynamic creation is done by clicking 3 points:
-
The first point is the center of the helix. You can click on the screen or enter coordinates in the dialogue area.
-
The second point gives the position of the helix entry point.
-
the third point determines the radius value. This value can be defined also in the dialogue.
|
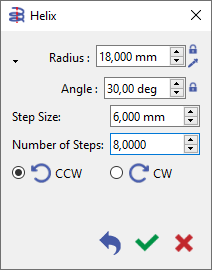
Then define the helix characteristics in the dialogue:
You can switch to Diameter with the small black triangle! |
|
|

|
|
|
|
||
Application
This helix can be very useful in following cases:
-
it can be the backbone for the design of solids (extrude along path for instance)
-
it can be a drive profile used with 5X simultaneous operations
-
it can be selected for machining with a manual operation (contouring) but calculated in tool center (no offset)
GO2cam cannot offset an helix, either in geometry (with Parallel Profile) or in machining (contouring with compensation).