
Presentation
|
|
You can design profiles for the limitation of machining. Several automatic shapes are offered (rectangle, ellipse/circle) and manual creation on-the-fly is also possible. |
|
|
You can watch a video at the bottom of page: click here |
The main advantages:
-
avoid designing wireframe geometry,
-
the profiles are used only for the current cycle, then they are hidden automatically,
-
you can edit and modify the limitation afterwards to adjust it according to the toolpath generated.
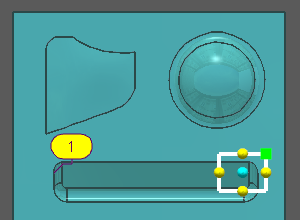
To create automatic limitation
|
Click on the icon; Create/Edit a profile for limitation, the view is automatically forced to 'Top' view, Select the type of area: Ellipse (or circle), rectangle or manual, Click on the part to position the limitation area: once positioned, the profile can be modified.
|
|
|
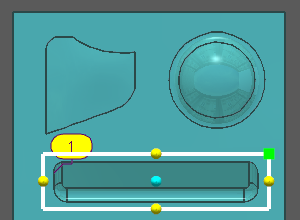
Rules for adjustment:
|
|
|
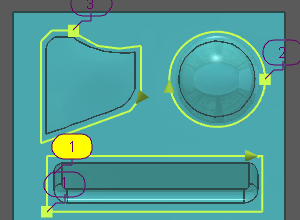
During the creation of area, several icons are available: Ability to undo the action and go back to previous step [1] Cancel the current area [2] Validate the current area [3] |
|
|
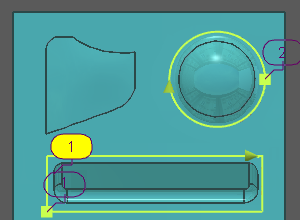
You can create several areas for the same selection of machining. |
|
|
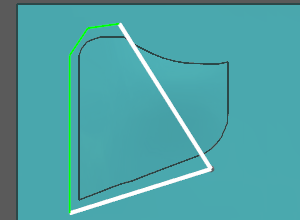
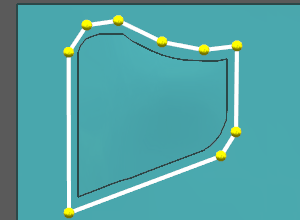
Process for manual creation: You have to create the area manually, by clicking points on-the-fly. You can also call the grid (with CTRL key) and click edges of solids or geometry.
At this step, you can make many adjustments:
|
|
|
|
|
The 3 limitation areas are defined: you can finish the selection of geometry.
|
The result of machining: in the strategy pages you can adjust the machining according to the limitation area: inside, on, outside, etc. 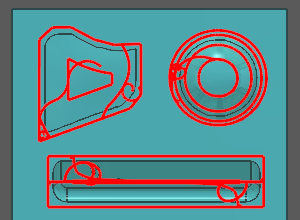
|
|
|
You can watch a video about Automatic Limitation Area:
|