
|
How to machine holes from 2 sides?
|
|
|
Two methods can be used in GO2cam to machine holes:
We will describe both methods below |
|
|
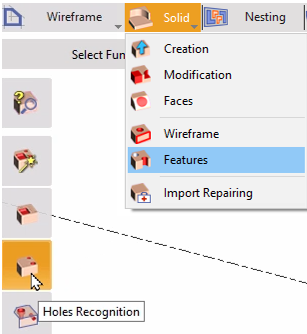
1. Automatic
In this method, the first step is to carry out Holes recognition. So in the design tab, select Solid>Features. Then choose Holes recognition command to launch the feature.
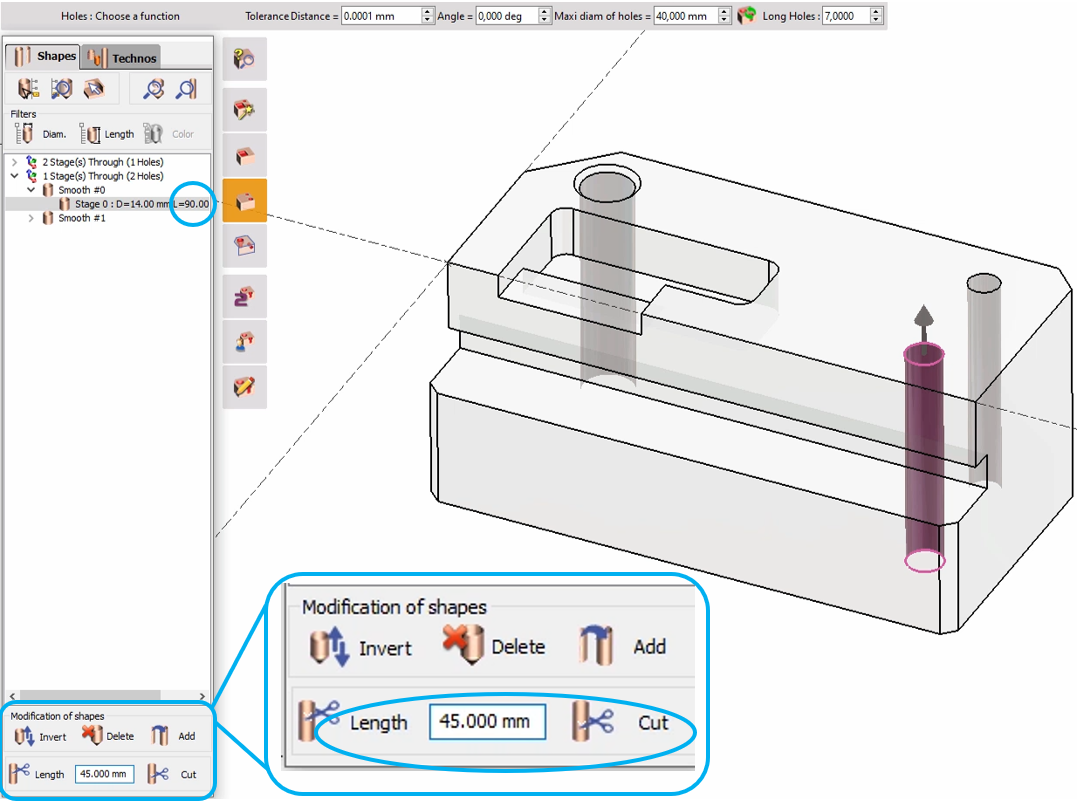
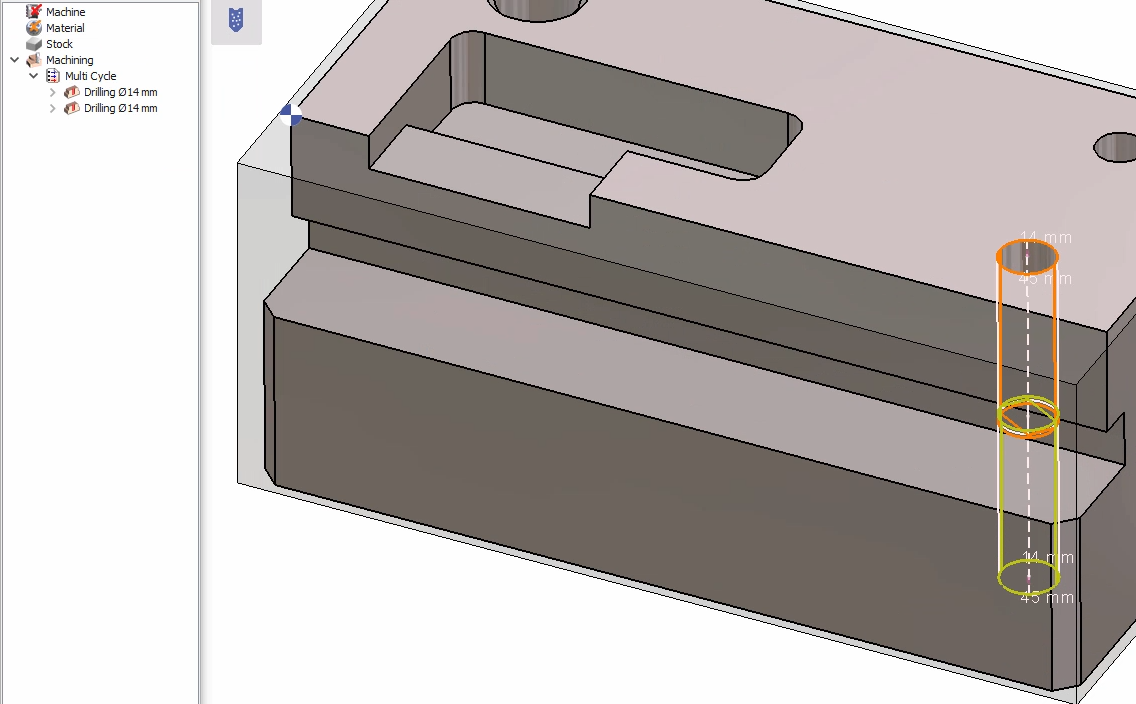
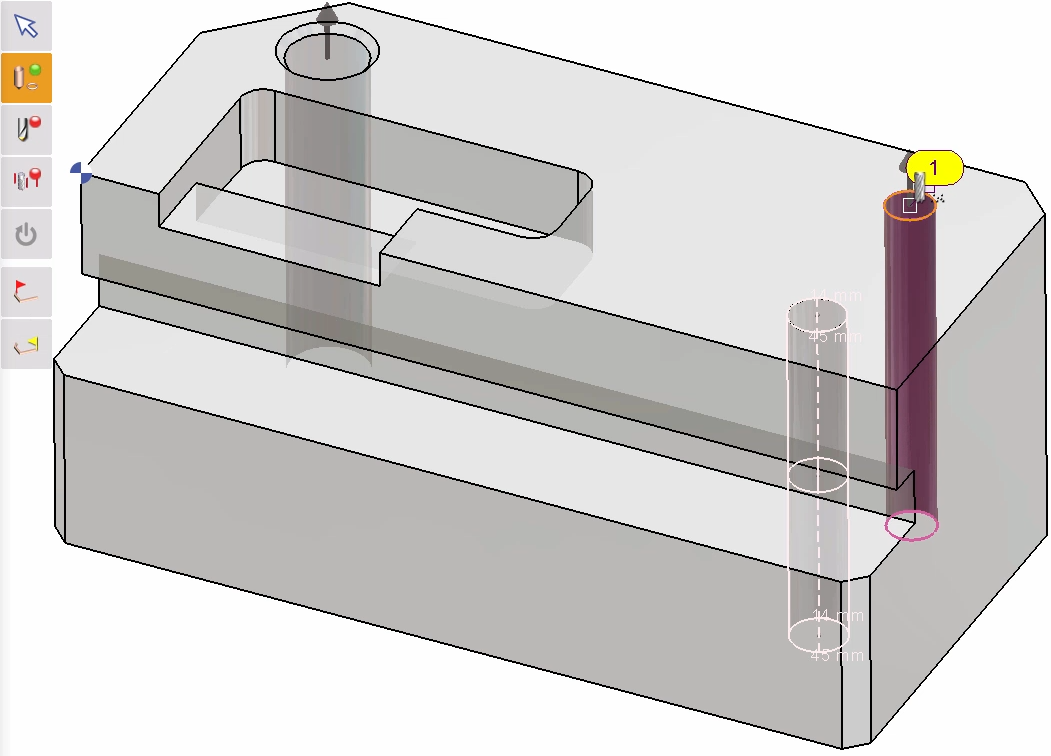
For the example, we will be focusing on the single hole as in the image to the right, with Length 90mm. In Modification of shapes, enter the length value to be half of the hole length (45mm) and click on Cut. You may be prompted with a dialog to ‘Cut the identical holes’ and if you want the same operation on the other similar holes, you can select Yes, but for this example we choose No. The topology of the hole is cut into 2 elements. We can now move to the Technos tab and apply a Standard hole as usual. Finally in Milling tab, choose Hole/Feature >Automatic. 2 separate planes are generated for the hole and upon calculation, the drilling is carried out once from the top at halfway and the 2nd from the bottom. |
|
|
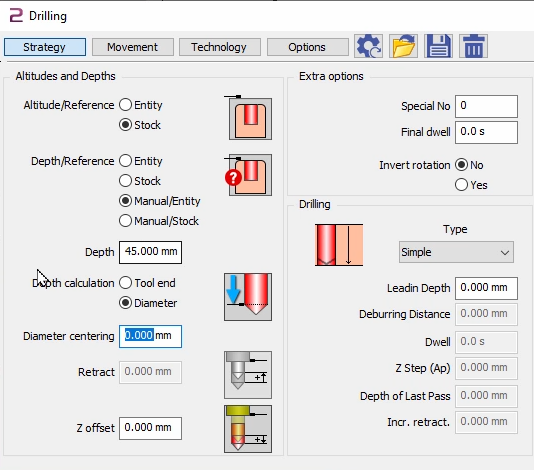
2. Manual In this method we can directly define a manual hole by going to Hole/Feature > Manual Holes. For the geometry, select the required hole( normally the holes are automatically recognised)
Select the tool and in the Drilling strategy set: Altitude/Reference : Stock Depth/Reference : Manual/Entity Depth : to the required length(in this case it will be halfway at 45mm) and calculate. To machine the other side, we will first need to create a plane on that side for the hole. The easiest way is to right-click on the back face and select ‘Plane on Face’.
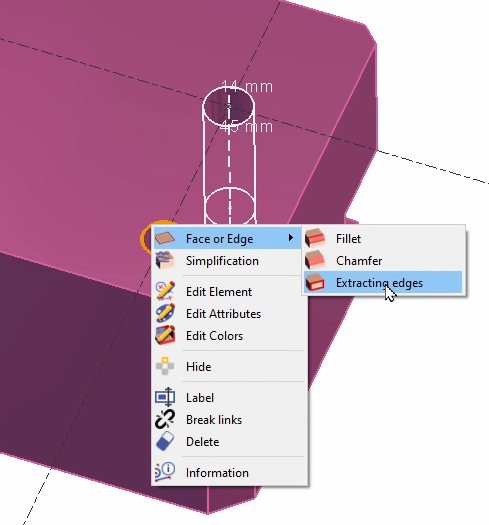
Next to be able to recognize the hole entity from this side, we have to extract the edge of the hole. This will assist in the geometry selection.
Finally, apply the manual holes cycle similar to the initial side with the same tool and strategy. For the geometry, we will have to select the extracted circular edge( you may hide the solid for easier selection).
|
|
|
▶️ You can watch a video on the right of this example showing both methods in details.
|
|
|
How to assign a user hole to a shape for multi-stages holes machining?
|
||
|
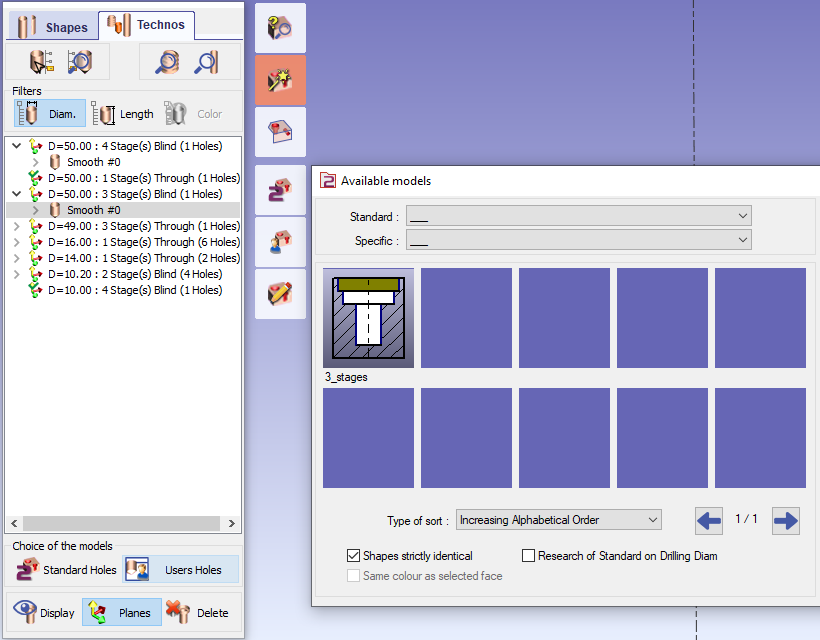
During the Holes recognition step, upon selecting the required hole(for instance we will choose a 3 stage hole), we have two possibilities to assign a user hole to the selection. |

|
|
|
1/ If User hole templates are already available, we can simply click on Users Holes.
The list of available compatible models is opened; GO2cam scans in all the different libraries to provide the list.
If only one model is compatible, you can apply it automatically without opening the table! For this, in Software configurations, in the Holes section, under 'Automatical Recognition on a Solid' Model, ensure to select 'Automatical applying if one available model' |

|
|
|
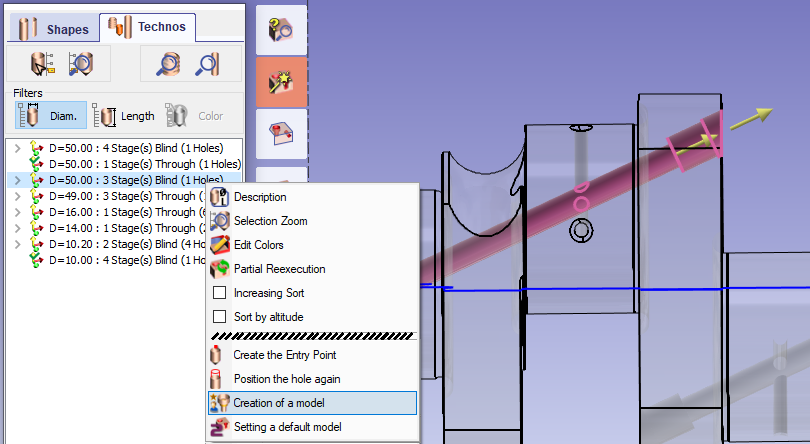
2/ If User hole templates are not available, we can right-click on the required hole and then choose 'Creation of a model'. This function enables to create the base of the model:
If you click on Users Holes when no matching template is available, you will be prompted with a dialog window where you can directly select Create a model.
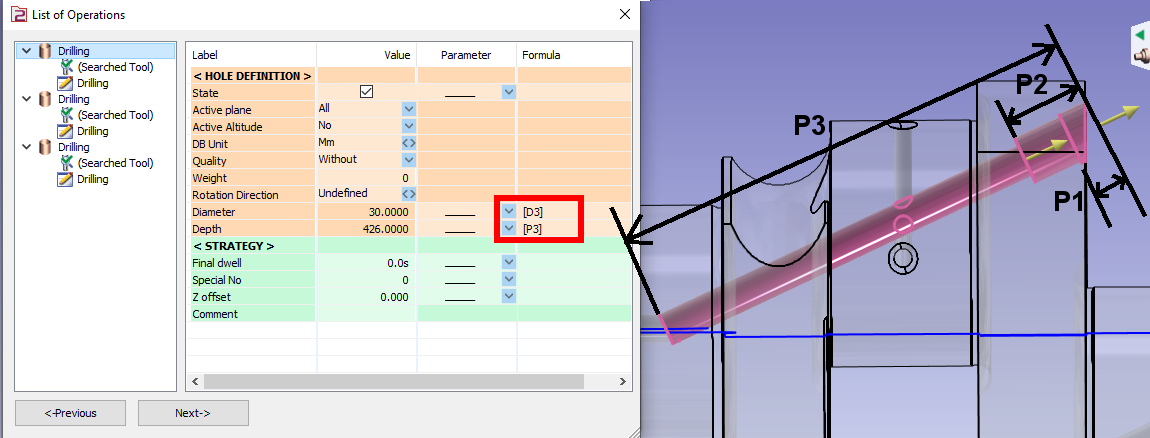
For the depths on the shape at this point, we have no access to the cycle parameters: the start of machining and depth are set automatically according to the type of operation! For instance:
As for the list of operations, they are arranged from the smaller to the bigger diameter. (D3>D2>D1) We can click on next and finally name and save the model after which it will be applied to the selected hole in the technos tab. |
|
|
|
How to program a top and back face counterboring?
|
|
|
If the 2 top and back counterbores have the same diameter, you can use the same tool and a single cycle! |
|
To do a counter boring operation, you have to tick Yes to the 'Machining of the top before plunge' parameter, this option will allow you to modify the Depth/Ref and 'Depth' parameters field.
|
|
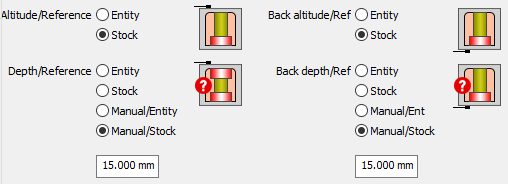
Then we focus on how to set references: Altitude and Depth
|
|
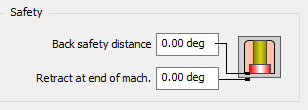
Lastly, we have define the back safety distance and retract at end of machining for the protection of the tool and the machined faces. |
|
|
Your Turn!! |
|
|
File: Pièce en U.PCE |
|
|
Open the ‘Pièce en U.PCE’
The 2 counterbores have the same diameter (14mm) that are 4 mm deep on the top face and 6 mm deep on the back face. |
|
|
Switch to milling.
|
|
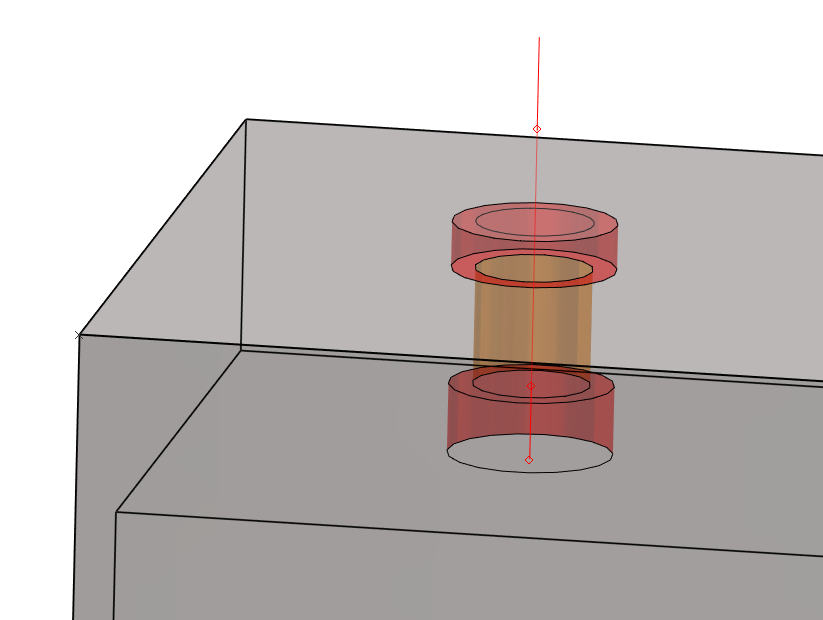
The end result must be the same as on the right. |
|
|
What are the options for retracts between holes in GO2cam?
|
|
|

|