Interactive System of Axis
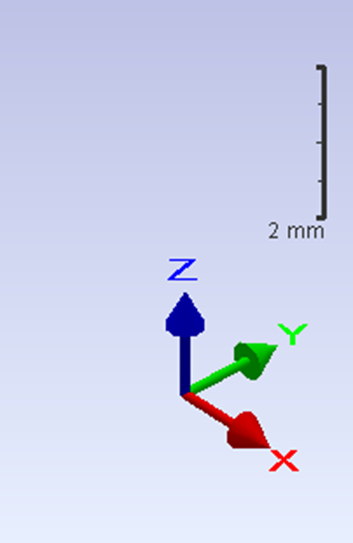
The interactive system of axis in GO2cam follows the standard RGB color. The color can still be changed in Tools/Options/Display. The Scale can also be found on the screen and reflects the current grading of the screen at that moment. Zoom in and out with the scroll to see the scale value adapt accordingly. |  | |
▶️ | You can watch a video at the bottom of page: click here | |
The interactive system of the axis has 4 purposes:
enables to visualize the XYZ axis of the current plane.
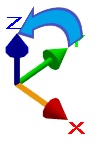
It also gives the access to numerous viewing commands. For this you have to click on the different parts of the system of axis:
 | Origin | Left click: change of views Left click + Ctrl key: invert the view Right click: access to the list of views |
 | Top of Arrow | Left click: invert the view |
 | Body of Arrow | Left click: rotation around the axis Left click + Ctrl key: rotation with a 5° step |
 | Letter | Left click: orientation of the vector in front of you Left click + Ctrl Key: reverse direction. |
3. Access the existing views
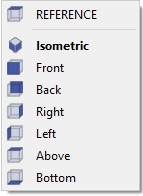
By right-clicking on the origin of the interactive axis system, you can look into the existing views that has been created. (Can also be done by pressing on F8).
You will see this dialog box appearing:

4. Creation of Planes
Clicking and dragging the origin of the interactive axis system and placing it on a surface of a solid automatically creates a new plane. By doing this, you can pick the desired location of the origin of the new plane.
Once the system is placed on a point or a plane, you will be prompted to position the plan as this dialog box appears :

You have the possibility to:
Rename the plane [1]
Set the plane according to the view by clicking on the icon [2]
Re-locate the origin of the solid by clicking on the icon [3]
Invert the direction of the vector by clicking on the icon [4]. Especially useful while creating a plane on a cylindric surface (cone, cylinder, hole,..)
Orientate the created system of axis by either changing the values or picking 2 points by using the [5] icon to define the x- orientation.
After defining these, you can click on validate [6] and the created system of axis will appear in the list of planes.
The option used to change the size of this system of axis changed recently: ‘Size of interactive axis system’ is in Tools / Options / Display.

