Skip table of contents

Text

This function allows the insertion of texts on the program window. The text entity is separate in itself; any text inserted is not considered as a combination of segments and arcs but as a single element in itself.

Text Insertion

Text insertion is generally considered for 2 purposes:

  1. To simply add a message/information in the .PCE file.

  2. For machining the text.

The process is simple and requires only filling the text dialog as shown below:

New611.png

The text dialog has been completely revised as from V6.11 with some new functions as we see below:

image-20240430-050617.png
1-20240322-165202.png

You can access the history of recent text and reused them.

2-20240322-165157.png

Can open .txt file to import a text.

3-20240322-165157.png

Can input character to your text.

4-20240322-165148.png

You can type the text required in this area.

5-20240322-165147.png

Predefined Engraving and Isostatic Style available.

6-20240322-165145.png

Create & customize a user style of font with the justification of text.

7-20240322-165144.png

Add frames to your text with our new option.

8-20240322-164433.png

You can overscore of any colour you like to your text also.

9-20240322-165217.png

You can use the angle feature to change the orientation of your text.

  • You can select the font required and change the text to Bold and Italic.

  • The total height scales the text based on the height value set.

  • You can invert the text and select the positioning point which will pilot the position of your pointer with the text.

  • The Line spacing ratio sets the spacing between the letters.

Ratio horizontal/vertical enables to stretch the text in the horizontal direction of the written text

  • The functions for ‘Write along an element’ allow to invert the direction of a text place on a curved or angles element and to place it at a specific distance along the element either by setting the % value or its unit value.

  • After selecting your configuration, you can simply click to place the text.

▶️ You can find a video here showing the various functions of the Updated Text dialog:
Text Dialog Interface.png

▶️ You can find a video here showing the various functions of the Text dialog:
Inserting a Text-20240814-105657.png

Text along an Element

You can also position a text on a curved element.

This can be an existing element/edge on a solid or a drawn element.

The text will respect the curvature of the element at all points.

Text along a Curve-20240814-105816.png

Text Machining

In order to machine a text element, you can:

  1. either carry out an engraving using the specific Text Marking cycle.

  2. or convert the text entity into geometry that can be recognized for machining by GO2cam.

Text Engraving

The Text Marking cycle is specific to machine text entities. The Text function is usually defined in the Design tab, however in this cycle, you will also have access to the function upon choosing Geometry Selection.

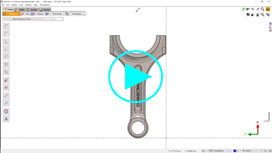
The majority of fonts generate an outline of the letter and this requires two passes in the machining of a single letter.

The process to define a text for single pass engraving is simplified and it just requires selecting the engraving style from the drop down list. This automatically sets the font to OLF SimpleSansOC for single pass text creation.

The following video on the right shows the case of defining a Text within the machining cycle itself and also shows the engraving of an inverted text.

Engraving Inverted Text-20240814-105933.png

JavaScript errors detected

Please note, these errors can depend on your browser setup.

If this problem persists, please contact our support.