
Please read the explanation below and also note that you can watch tutorial videos at the bottom of page.
Complete procedure to define your cutting conditions
|
1. Do a right-click on Material in the Machining Tree. |
|
2. Choose Edit to open the material dialog box. |
|
3. You can either open an existing file or create a new one |
|
4. When defining a cycle, in the technology page, use the icon Cutting Conditions to choose the quality of machining. You can also choose it or change it afterwards in the operation list. |
|
Note : if you change the tool's diameter, the speed parameters are automatically updated. 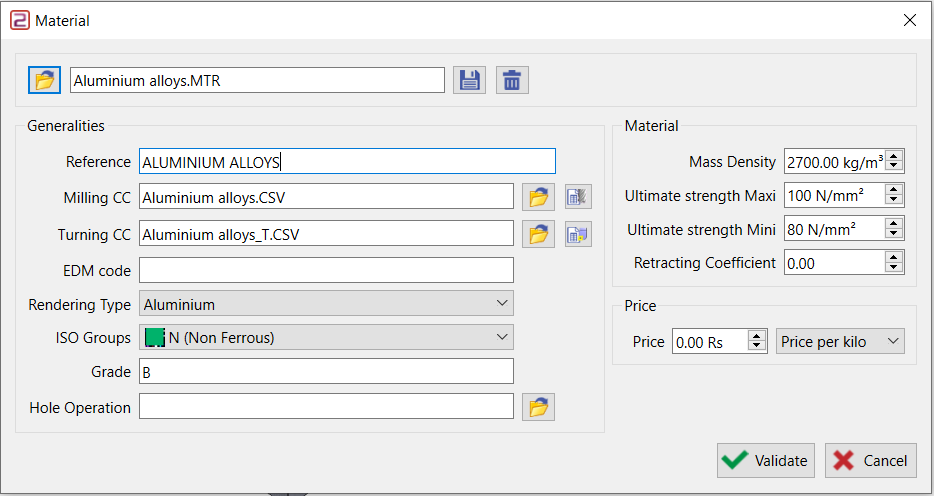
|
Create a new Cutting Conditions File
|
To create cutting conditions files (*.CSV) from scratch, simply give a name, click the ‘+’ icon and a new file is automatically created. |
|
|
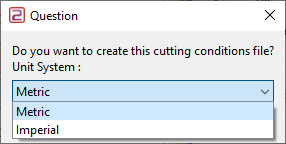
Also, when creating this new file, you are asked if the file will be in metric or inch unit. |
|
Edition of the CSV file.
Open the cutting conditions window by clicking on the icon shown below.
In GO2cam, you have two ways to edit a csv file, either by Manufacturer Tools or Generic Tools.
For both, the process of creation includes two pages:
-
First page: Tables of tools or tables of ranges.
-
Second page: Edit the cutting conditions parameters.
There are some common commands when editing the csv file:
|
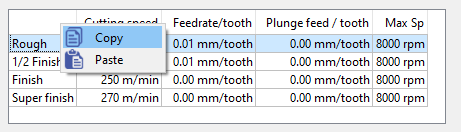
Input of Values: You can enter values with the keyboard of course but you can also copy some values and apply them on other lines. Right-click on the selected lines to get options for that. |
|
|
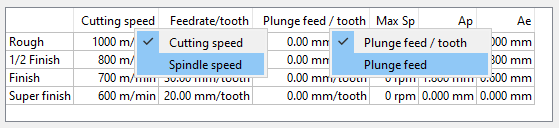
Choice of Units: A right-click on the column head enables to switch from Cutting Speed to Spindle Speed. Same for the calculation of feedrate. This choice is very important because it also determines how the calculation of cutting conditions is done in case of change. |
|
After making a change in Units, when going back to the table of tools or table of ranges you may find range of tools or single tools with different units than the rest of the table. In that case, they are displayed in a blue colour, so that we can easily see that the units are not the same as the majority.
To Cancel the changes click on the “X”
To Validate the changes click on the other icon.
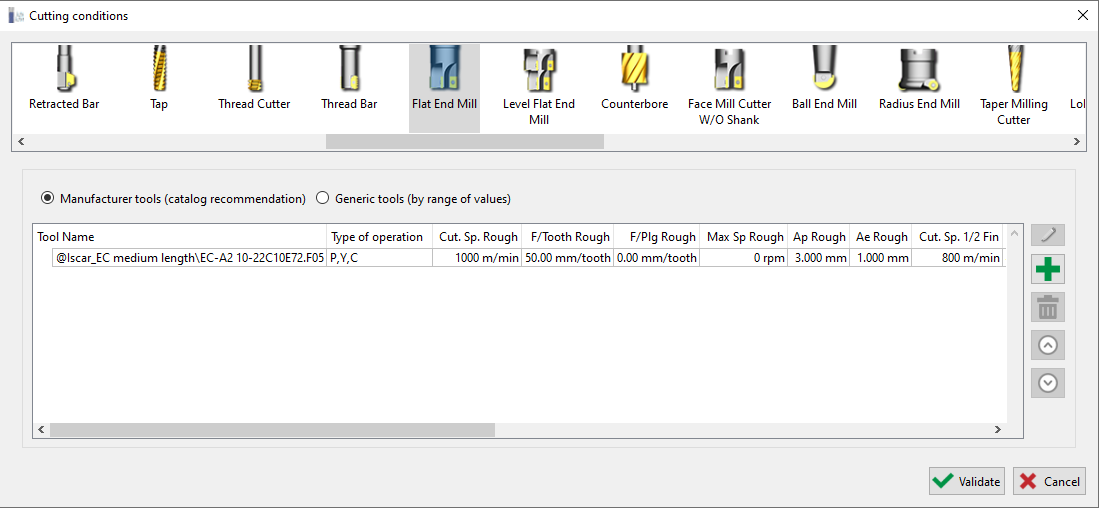
Manufacturer Tools
Here, we can define the cutting conditions for one specific tool. Cutting Conditions can be defined per each tool. Also, a same tool can be defined several times because you choose the type of application for the tool: contouring, pocket, millyuGO, etc.
In the First page, you will have the table of tools as shown below. To create a cutting conditions file, click on the Add button.
|
A complete list of tool libraries will open where you have:
Choose a tool and click Open. The second page will appear. |
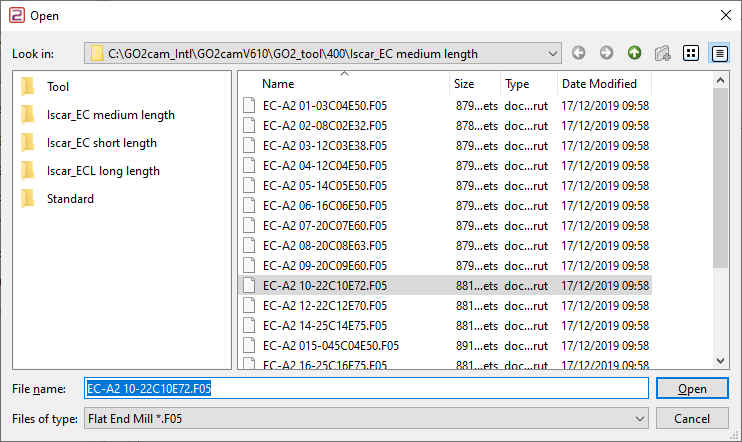
|
In the Second page, Edit the cutting conditions for each tool.
|
You can insert the values, in the table of parameters. For the operation type, you choose among the different options. |
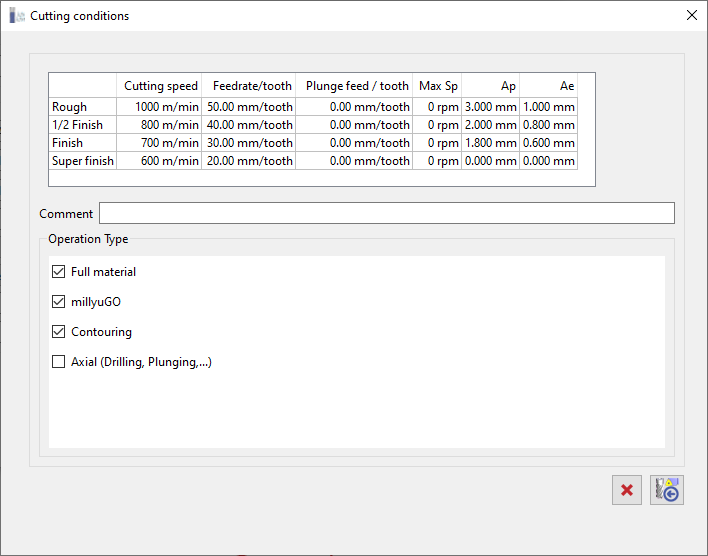
|
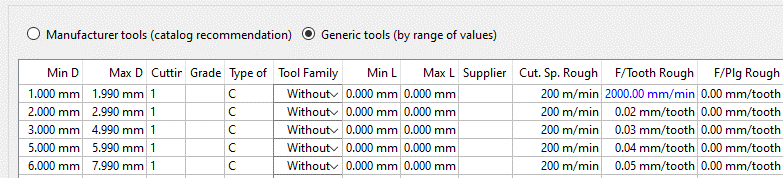
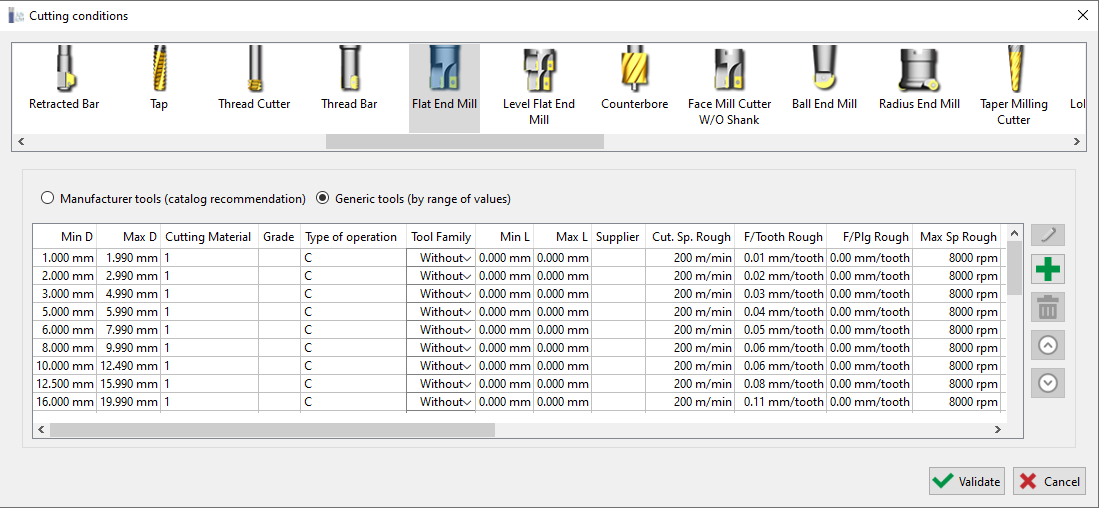
Generic Tools Editing
Here, tools are sorted by range of values and the cutting conditions are defined for each range of values.
In the First page, you will have the table of ranges.
New values can be modified directly in the table fields.
To create a new cutting conditions:
-
First select the generic tool and click on the Add button. A new row will appear with the same values.
-
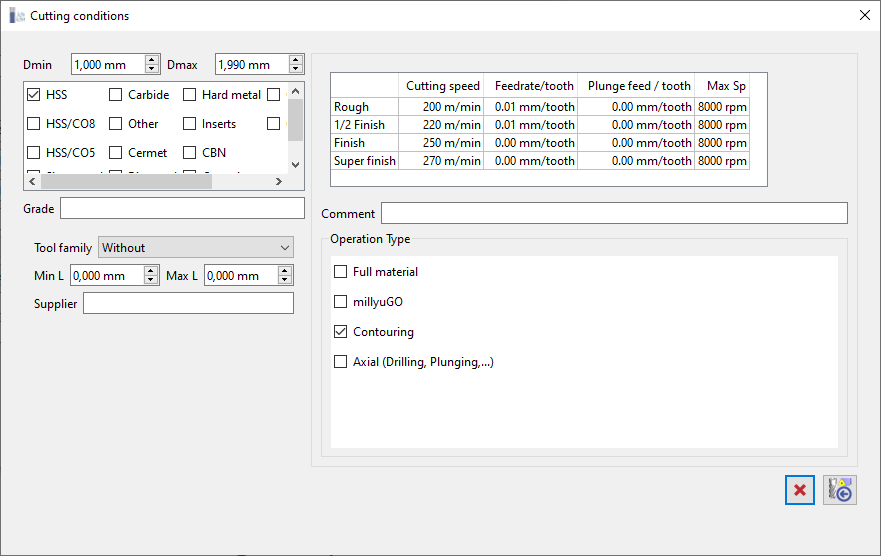
Then edit the new row by double click on it or by clicking on the Editing icon.
In the Second page, Edit the selected line enables to define cutting conditions for each tool or each range of tools.
|
|
|
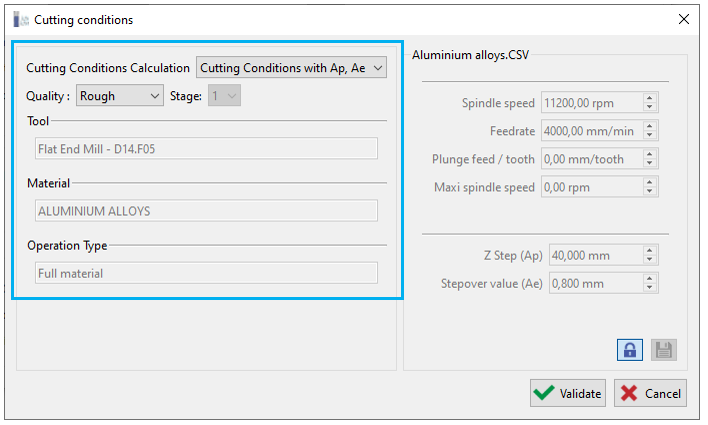
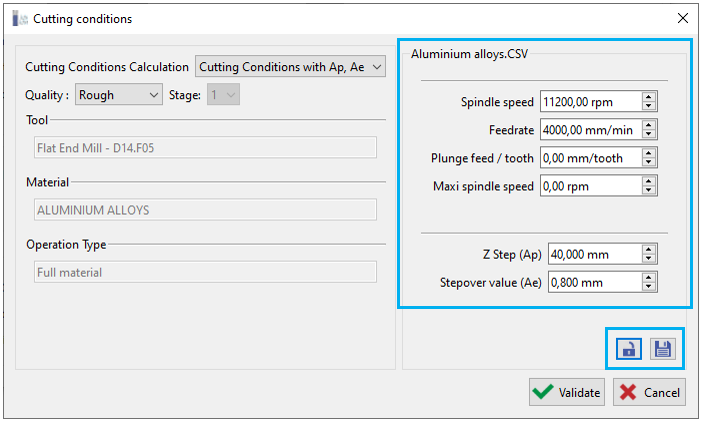
Applying the Cutting Conditions
Management of Z Step & Lateral Step
The technological parameters Ap (Z step) and Ae (Lateral step) can be defined for each quality (roughing, ½ finish, etc.).
When the material file is loaded and the tool chosen, the Ap/Ae values are taken and applied from the cutting conditions.
This is only possible if you manage tools with the mode ‘Manufacturer tools’.
To manage the Ap/Ae cutting conditions, you need to open the “List of operation” for techno pages (For cycles and opelists).
In the Mode column, you have three modes to select from:
-
Without calculation
-
Cutting Conditions Only (no Ap/Ae)
-
Cutting Conditions Full
If the new calculation modifies the Ap and Ae values, we display the modified values into the information box.
Also, the update command is highlighted with the orange balloon.
Technology Page
|
Access the cutting conditions from the techno page by clicking on the icon. |
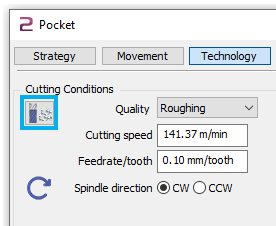
|
|
|
|
|
|
|
|
▶️ You can watch a video on Edition of a CSV file. 
|
▶️ You can watch a video on applying the cutting conditions. 
|