
A layer may be analogized to a transparent sheet utilized during the drawing process. Employing multiple layers facilitates the organization of drafts by categorizing different types of geometries or elements. For instance, title blocks and dimensions are typically consolidated on a distinct layer separate from those used for geometries.
Layers constitute one of the attributes managed within the Pallet, alongside properties such as color and line type.
The following section provides detailed instructions on how to:
-
Change the current layer
-
Copy the current layer to another layer
-
Select a layer
-
Filter and sort layers
-
Manage layers
Change the Current Layer
|
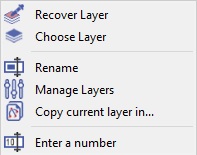
Upon initiating GO2cam, the default working layer is #1. To modify the active layer, several methods are available: Right-click on the layer name within the interactive status bar to display a context menu as illustrated below. |
|
1. Select a Layer by Number
|
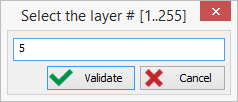
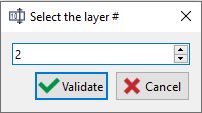
Select the option ‘Enter a number’. In the dialog box, input the desired layer number and confirm the selection. |
|
2. Select the Layer from the Layer List
There are two methods to access the layer list:
-
Right-click on the status bar and select ‘Choose Layer’.
-
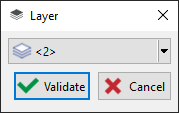
In the Management of Attributes panel, click the drop-down list adjacent to layers.
|
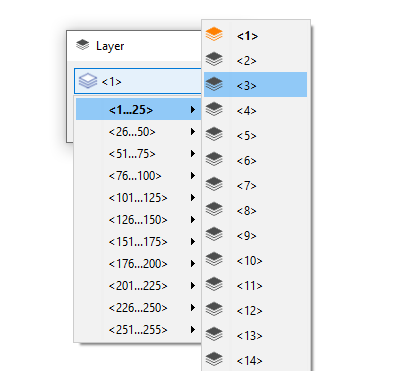
Opening the combo box displays a list of layer groups such as <1…25>, <26…50>, etc.
Selecting a group reveals a secondary menu from which the desired layer can be accessed. The current active layer is indicated by an orange icon.
|
|
|
3. Select the Layer by Clicking an Element
Two methods are available to access this command:
-
Right-click on the status bar and select ‘Recover Layer’.
-
In the Management of Attributes panel, click the Layer pipette icon.
Subsequently, clicking any element on the screen prompts GO2cam to identify its layer number and apply it as the current active layer.
Copy Current Layer to Another Layer
|
This feature allows for the duplication of the active layer into a specified target layer. Upon activation, a dialog prompts the user to specify the destination layer number. Confirming this action replicates all elements and properties from the source layer to the designated layer. |
|
Filtering and Sorting
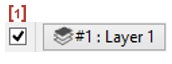
Within the status bar and Management panel, a checkbox labeled [1] enables the display of elements exclusively associated with the current layer.
Layers are also accessible within the Filter Dialog.
This dialog includes a dedicated ‘Layers’ tab that presents a hierarchical tree of active layers, displaying their assigned names if applicable. Users may toggle visibility of layer contents by checking or unchecking corresponding boxes.
Layer Management
Access the layer management interface by right-clicking on the status bar and selecting ‘Manage Layers’.
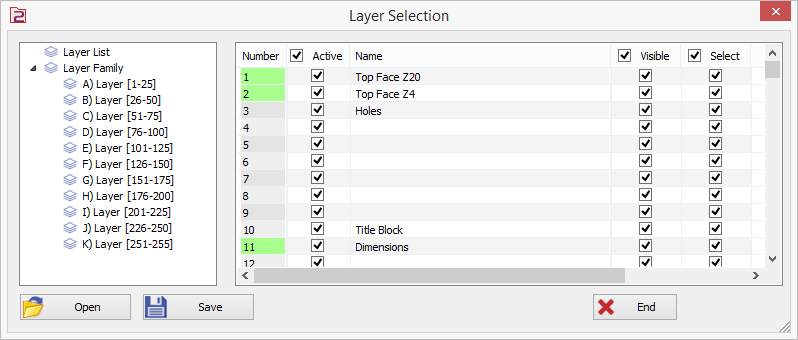
This action displays a comprehensive table listing all layers and layer families.
On the left, the table enumerates the Layers List from #1 to #255, followed by the Layer Families, sorted alphabetically from A to K, each family comprising 25 layers.
The table offers several functionalities applicable to both individual layers and layer families:
- Active: allows deactivation or ‘freezing’ of a layer or family, rendering it invisible in the pallet and filter dialog.
- Name: enables naming of layers and families; pressing the Enter key facilitates rapid navigation to subsequent entries.
- Visible: controls the visibility of a layer or family.
- Select: when unchecked, elements of the layer remain visible but cannot be selected or modified.
The occupancy status of layers is indicated by a green highlight on the Layer number cell.
Customization options permit saving the current configuration to a file with the extension *.LAY. This file can be loaded when working on different parts to apply the predefined layer settings.
If a configuration file named GO2cam.LAY is created, it will be recognized as the default and automatically loaded upon each GO2cam session startup.
The dialog box retains its last position and size in memory, ensuring consistent placement upon subsequent openings.