Machining Holes in GO2cam
▶️ You can watch a video at the bottom of page: click here |
Presentation
2 types of entities can be machined as a hole in GO2cam:
the circle
the hole: feature with dimensional and technological data.
Process for a circle
 | Geometry Selection | Selection of the holes to machine and optimization of rapid path |
 | Tools Library | Selection of a tool |
 | Point to Point Cycles | Choice of a cycle and its strategy, input of the Z start and the depth. |
If several operations are done on the same element, you have to repeat these operations (centering+drilling+tapping for example).
Process for a hole
2 types of holes are available in GO2cam: | |
 | the standard holes, |
 | the users holes. |
Standard Holes
Location: Design/Wireframe/Holes and Design/Solid/Features Define the type of hole (smoothed, tapped etc.), blind or through, its diameter and depth values. You can enter standard M8, M10 etc. read in tables. These tables can be customized, please read the tip below. A customizable list of operations is automatically created. Note: standard holes are 2 stages holes maximum. For machining, go to Milling/Hole/Features/Automatic and click the Start Calculation icon. | 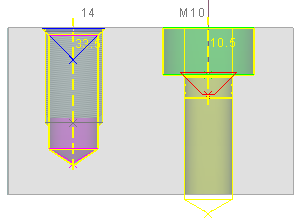 |
The standard holes are defined according to normalized tables. You can define your own tables in the csv format and save them in the directory GO2camV6**\Holenor.
Then declare them in Tools / Options / Holes.
We advise you to base your files on the default files to respect carefully the syntax.
Users Holes
Location: Design/Wireframe/Holes and Design/Solid/Features on Solid
The Users Holes are available only with the HMF (Holes Machining Features) optional module.
The principle is to define specific holes models.
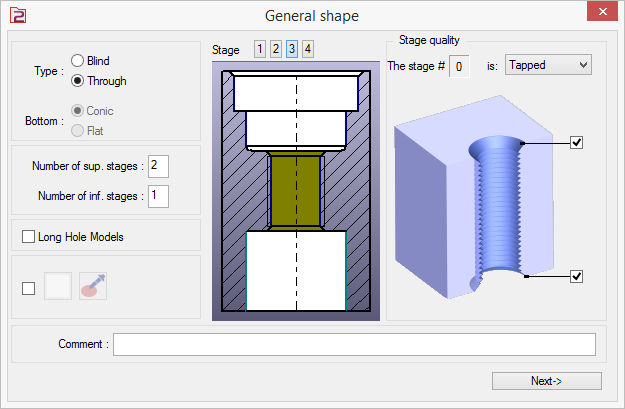
In a very friendly user interface, define the topology of the hole (blind or through), the number of stages and the quality of the stages (smooth, counter bored, tapped).
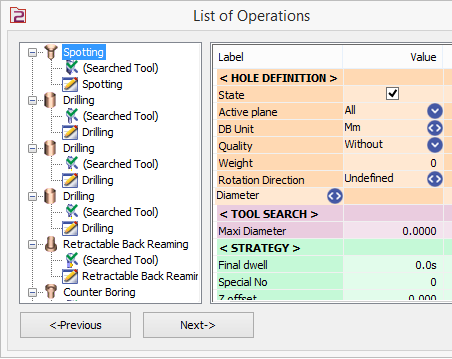
An operation list is automatically created to machine this shape. Then you can adjust this operation list, add or delete operations and even define possible formula.
 |  |
That way, you can define yourself the library of the holes that you machine frequently. | 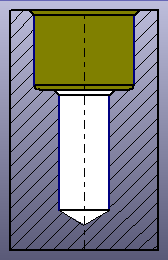 | 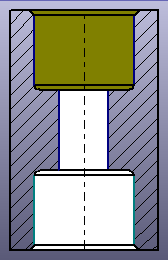 | 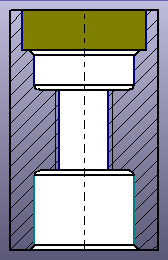 | 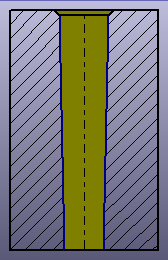 |
2 steps | 3 steps | 4 steps | Conic Hole |
You have the possibility to assign a color to a user hole template. This color will be used during the Holes Recognition to apply a hole model to colored holes.
During the creation of Standard and Users Holes, you have now the possibility to subtract the holes from the solid part, by clicking on this icon
Machining
You can create holes with direct input, by positioning them directly on the draft with their coordinates. But you can also use the holes features when importing CAD files by recovery of 2D and 3D models.
Here are the possibilities, detailed in the next pages:
2D import: transformation of circles and points in holes,
3D import: recovery of solid shapes.
2D Import
 | Transformation into Hole | Ability to transform the circles and the points into standard or user holes. Choose the model corresponding to the draft and apply the values of the dimensions. |
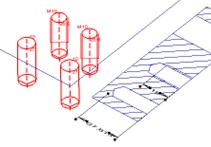
Location: Design/Wireframe/Holes
3D Import
When you import a solid model, we can recover cylindrical shape by using the command:
 | Hole Recognition | This command enables to recover automatically all the cylindrical shapes found in the solid. |
The Z direction is given automatically (but can be modified by the user if needed), you can combine coaxial shapes together, give attributes and many other commands.
Finally, you are able to assign standard or users models to each shape. GO2cam analyses the shapes and select the compatible models in terms of topology. If there are several possibilities, the user can choose which model to apply.
After only few minutes, all the holes are created, and you are ready for machining. For this, you simply switch to Milling, choose Hole / Automatic and launch the automatic calculation.
 | The color of the vectors of holes is managed and can now be customized in Theme by the color for Alternative 1. This allows the user to adjust the color for better viewing, based on their personalised theme. |
The Holes Recognition is now accessible even if you do not have the HMF option! You can use it to apply standard holes on the solid. HMF is now limited to the creation and application of users holes.


