
|
|
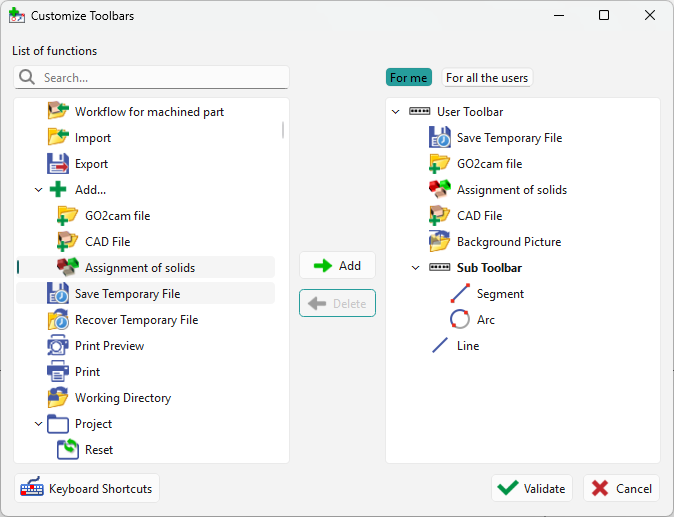
Creation of a Customized Toolbar with the functions you need to have all the time on your screen. |
Note that a toolbar can be created for each technology (Milling, Turning, EDM, Layout Design etc.) but this is only limited to one toolbar by technology.
The Customize toolbar file is located in the ini directory under the name of “tbr_product_mill_classic.usr”.
To create your customize toolbar
|
Click on the Tools menu and then Customize Toolbar.
|

|
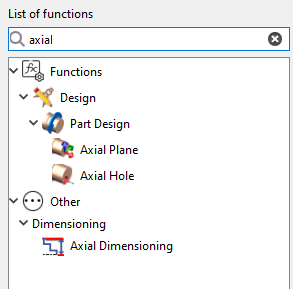
You can also utilize the search option to quickly locate specific functions by their names, making it easier to find and customize toolbar options. |
|
|
|
|
You now have more flexibility when managing your workspace with two distinct toolbar options:
|
|
Sub Toolbar

|
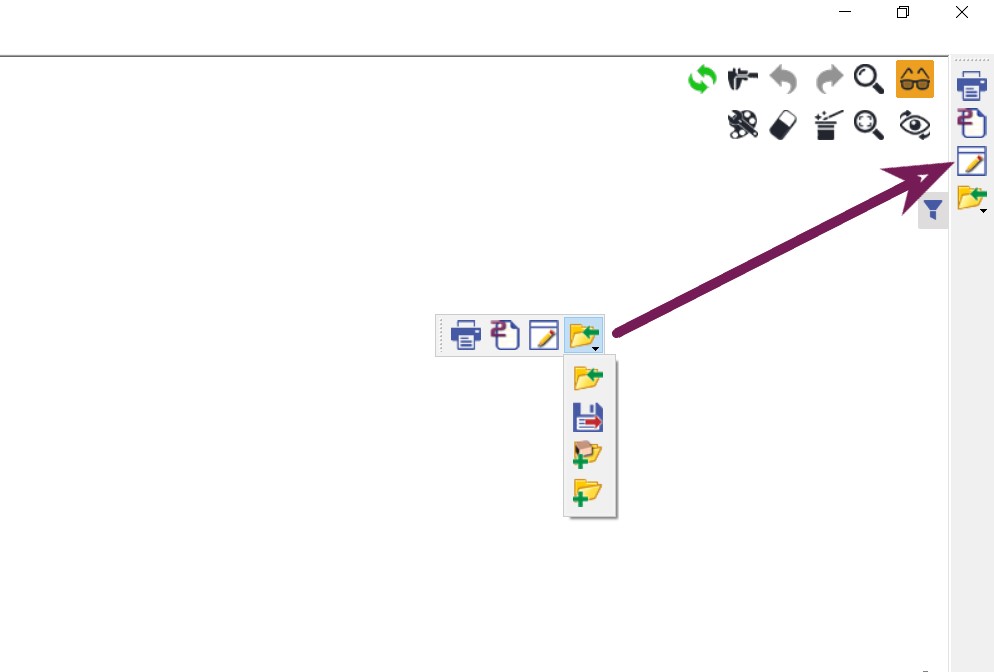
Once created, the Sub toolbars are displayed with a black arrow:
|
|
|
Location of the Toolbar
You can let the Toolbar free on your screen. You can also put the Toolbar on the right hand side bar like shown in the image or anywhere else (left, top and bottom bars)
To manipulate the bar, on the left side of it with dots, click and hold and then you can move it anywhere and place it on the side if you want. To move it from a bar, it is the same procedure.
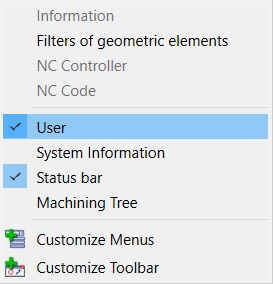
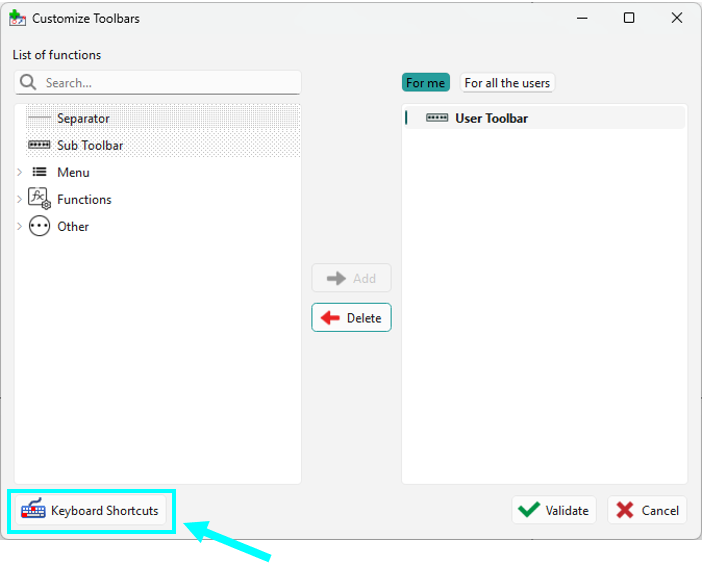
Note : If the customized toolbar does not appear, do a right click on the top bar of GO2cam:
Check the box in front of 'User' to make the toolbar appear.
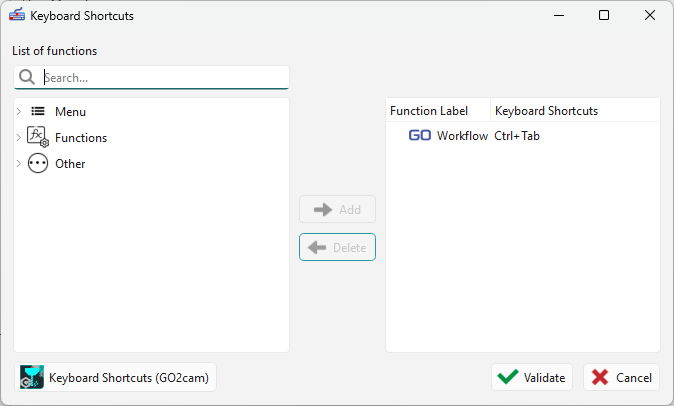
Keyboard Shortcuts
|
|
Create custom shortcut keys to access your favorite features more rapidly. This update includes a dedicated interface, similar to the toolbar customization menu, designed to make defining new key combinations intuitive |
How to Access
To begin setting up your personal shortcuts, navigate to the Tools menu and select Customized toolbars. At the bottom of the resulting dialogue box, click the dedicated button labeled Keyboard shortcuts to open the assignment interface. How to Use
If the shortcut you choose is already assigned, a message will prompt you stating that the current shortcut exists; you can also click the Keyboard Shortcuts(GO2cam) button to view a full list of existing default shortcuts.
|
|

|
|