
Manual Nesting
|
Click at the icon to manual nesting an stl file.
|

|
|
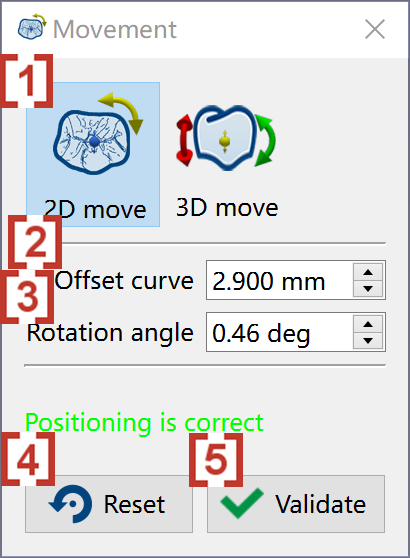
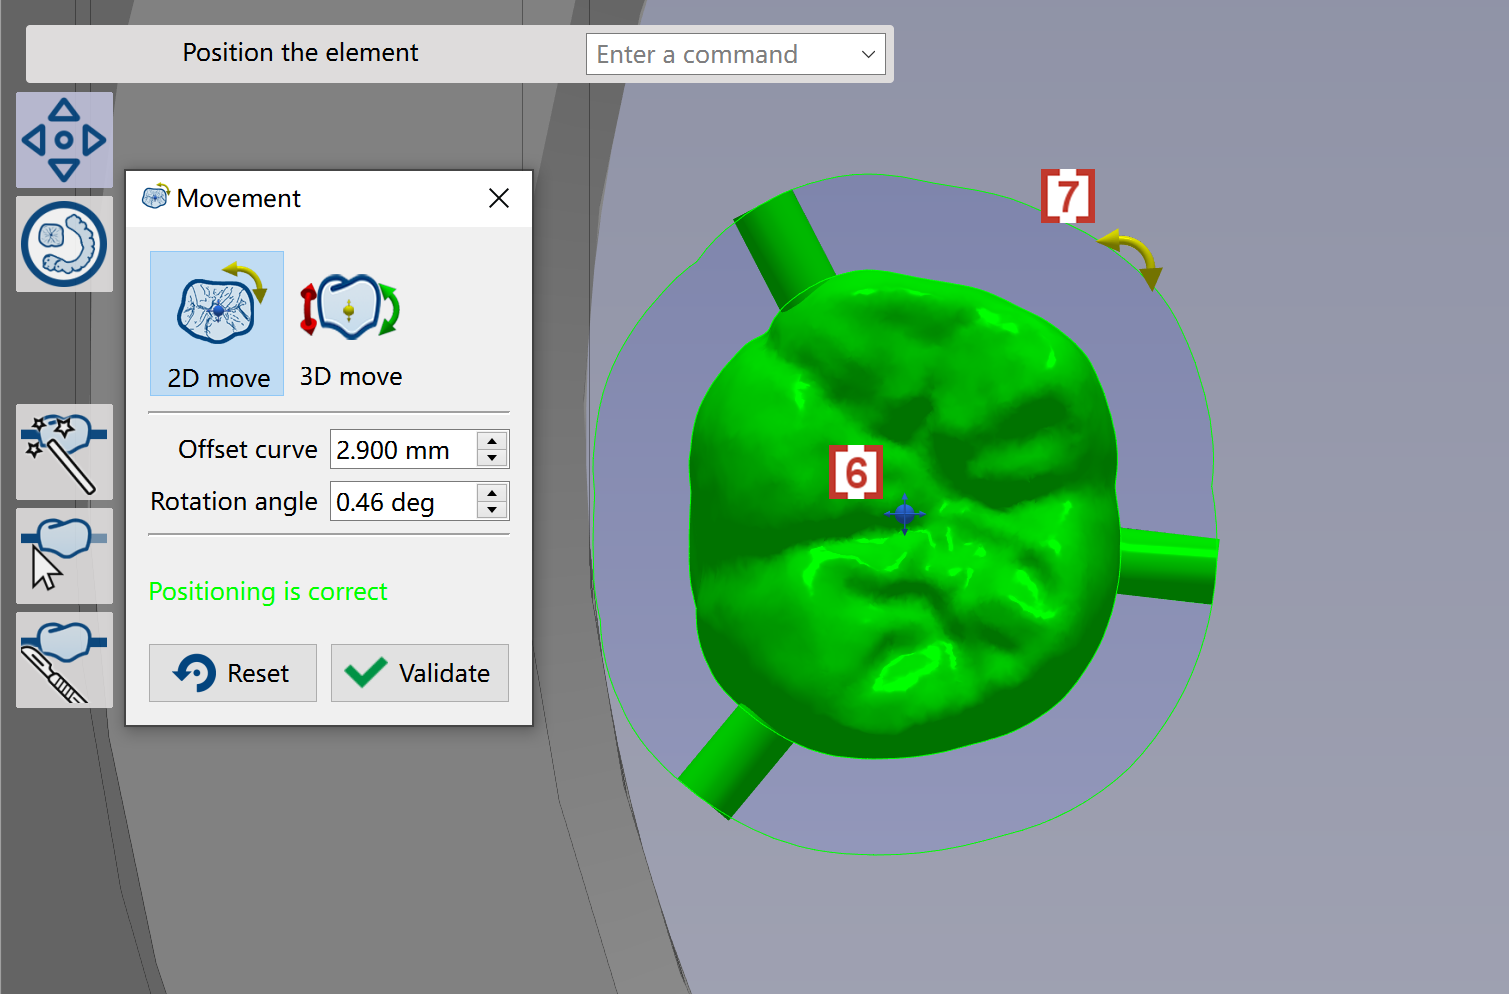
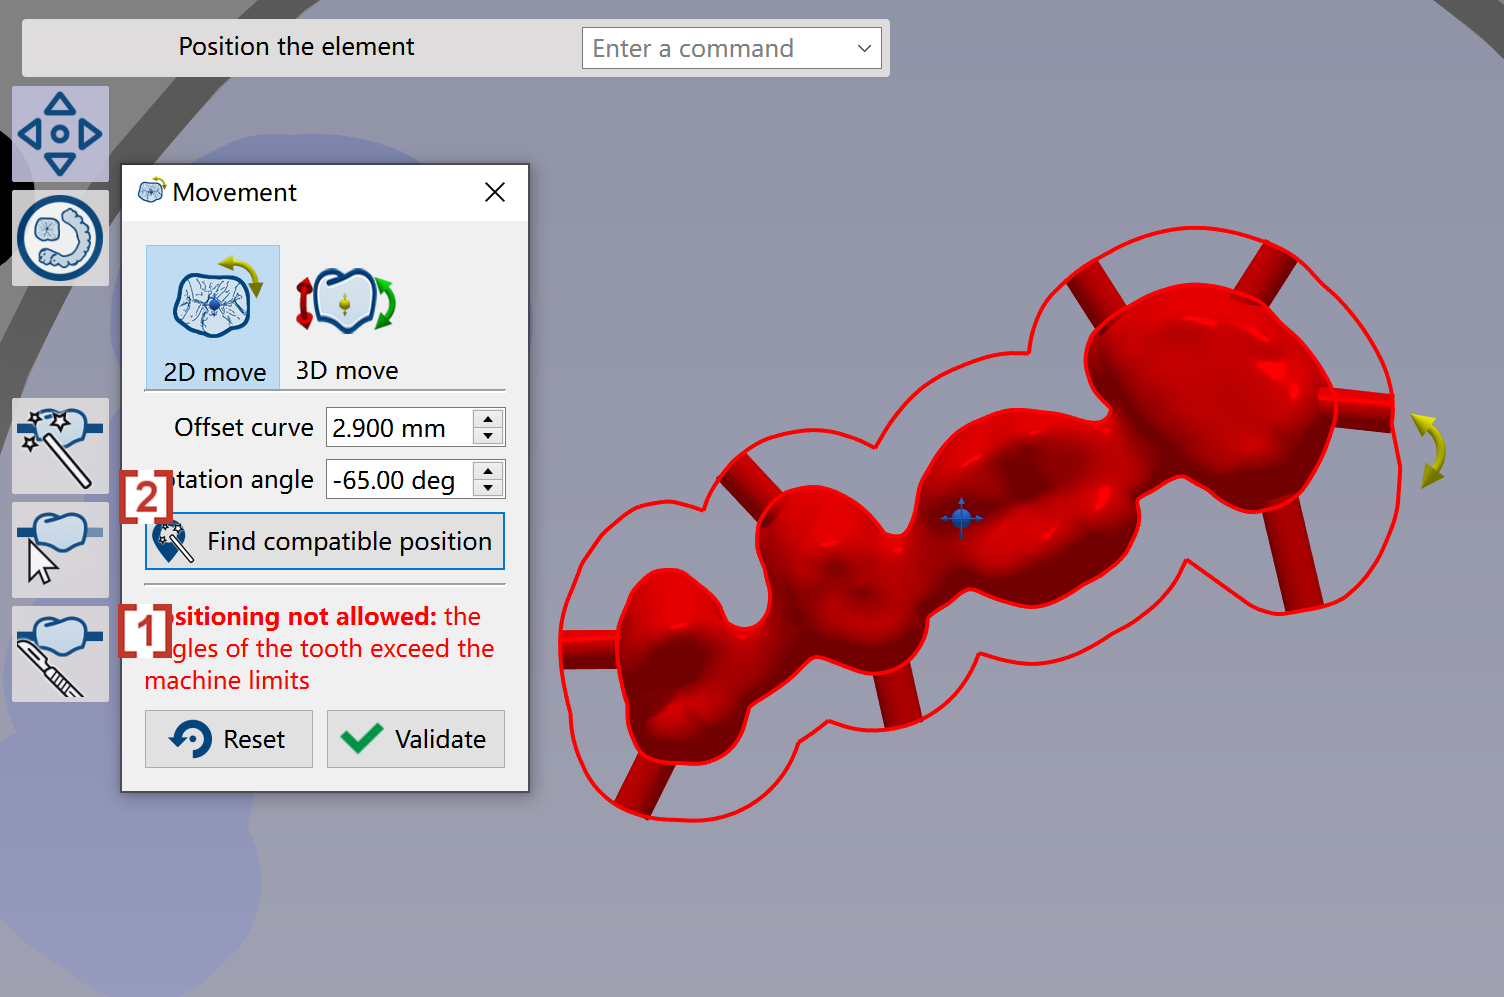
We will enter 2D move mode [1] by default. In the popup window, we can enter the value of offset curve [2] and Rotation angle on 2D XY plane [3]. Click at Reset [4] will recover the original 2D position. If movement is done, you can click at Validate [5]to close this function. You can also drag the blue point [6] to move the element and drag the yellow arrow [7] to rotate the element. Sometimes we will automatically enlarge the value of offset curve [8] to avoid collision. |
|
|
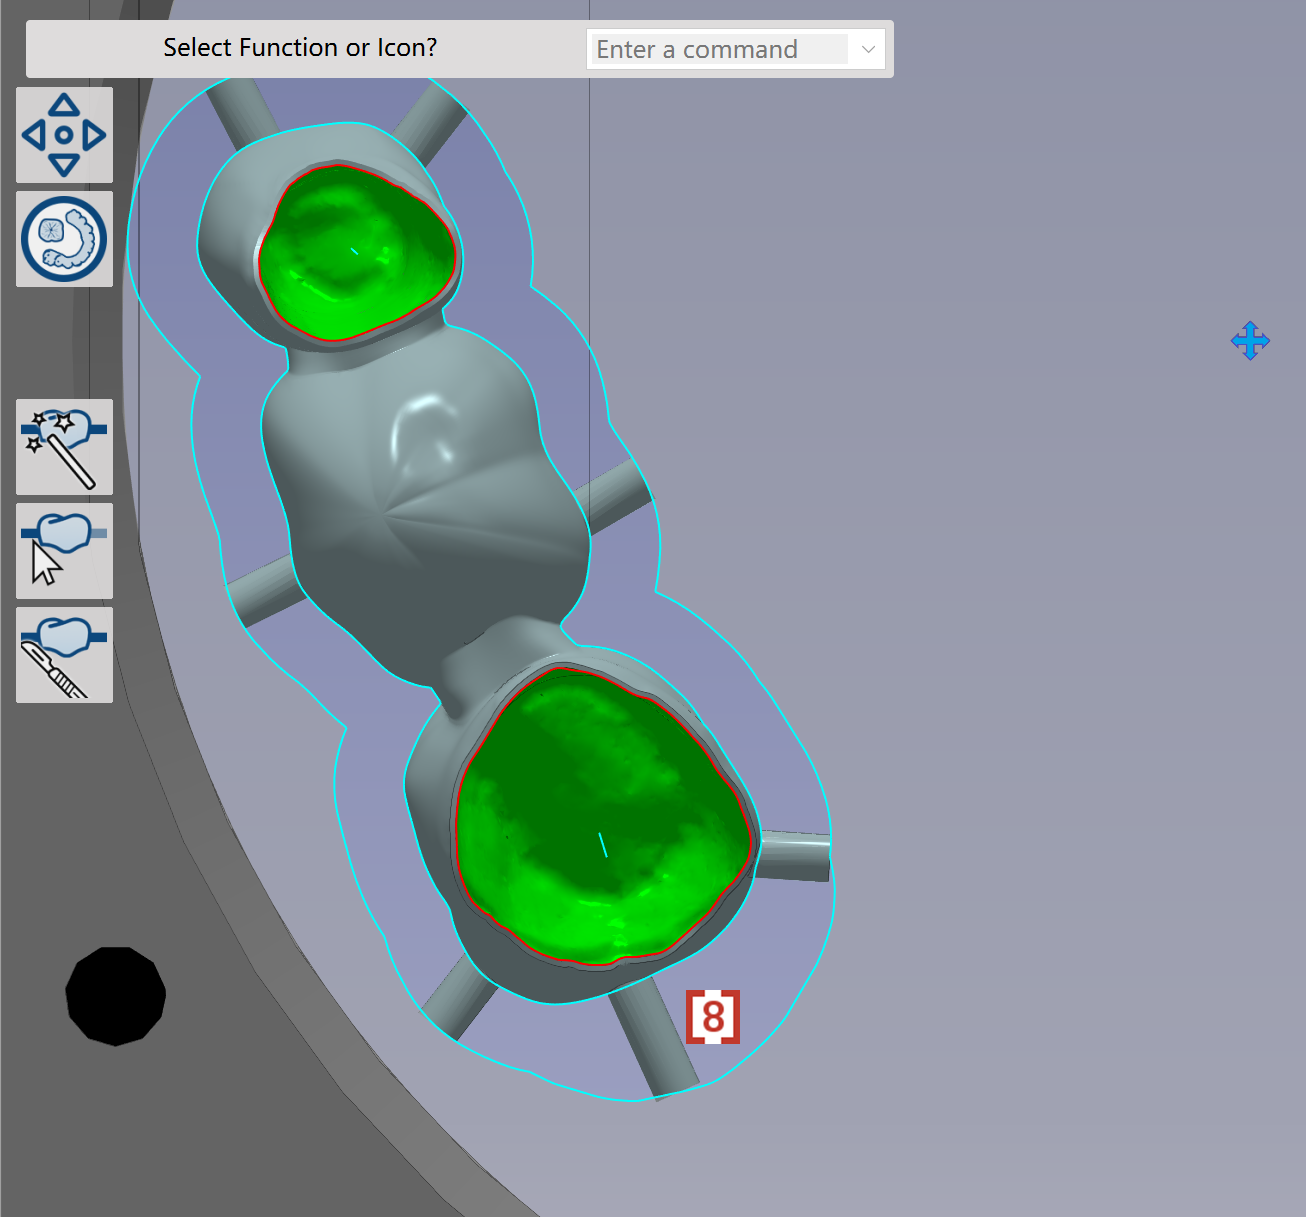
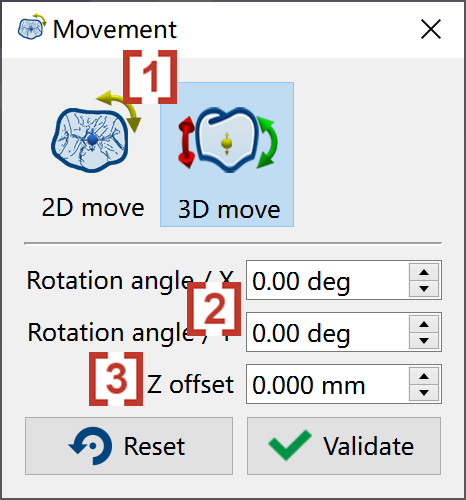
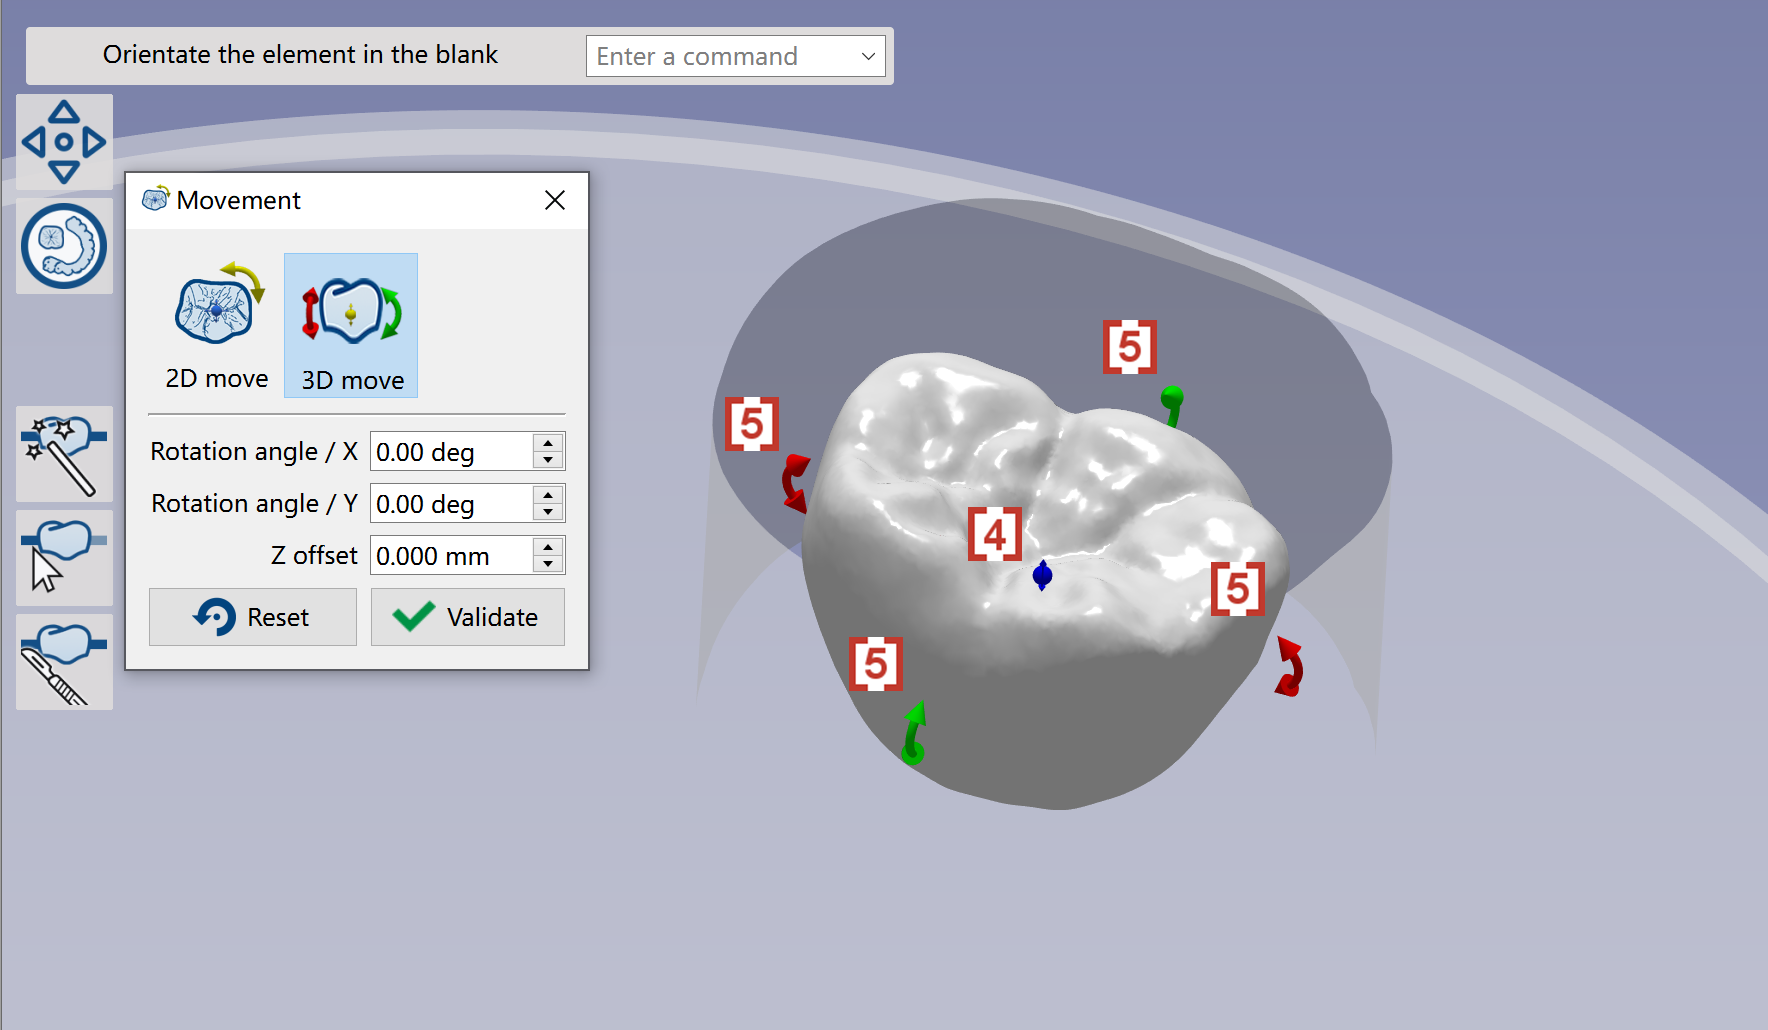
We can click at 3D move [1] to move the elements in 3D. In the popup window, we can define Rotation angle along X Y [2] and move the element along Z [3]. You can also drag the blue point [4] to move the element along Z and drag the red/green arrow [5] to rotate the element along X Y axis. |
|
|
When we rotate element in 2D/3D, the angle capacity will be automatically checked. If the tool axis exceeds angle capacity of machine tool, we will give warning message in red color [1]. You will need to change the rotation until the warning is disappear. You can also use the function 'Find compatible position' [2], GO2dental will automatically find a correct angle for the element. |
|
|
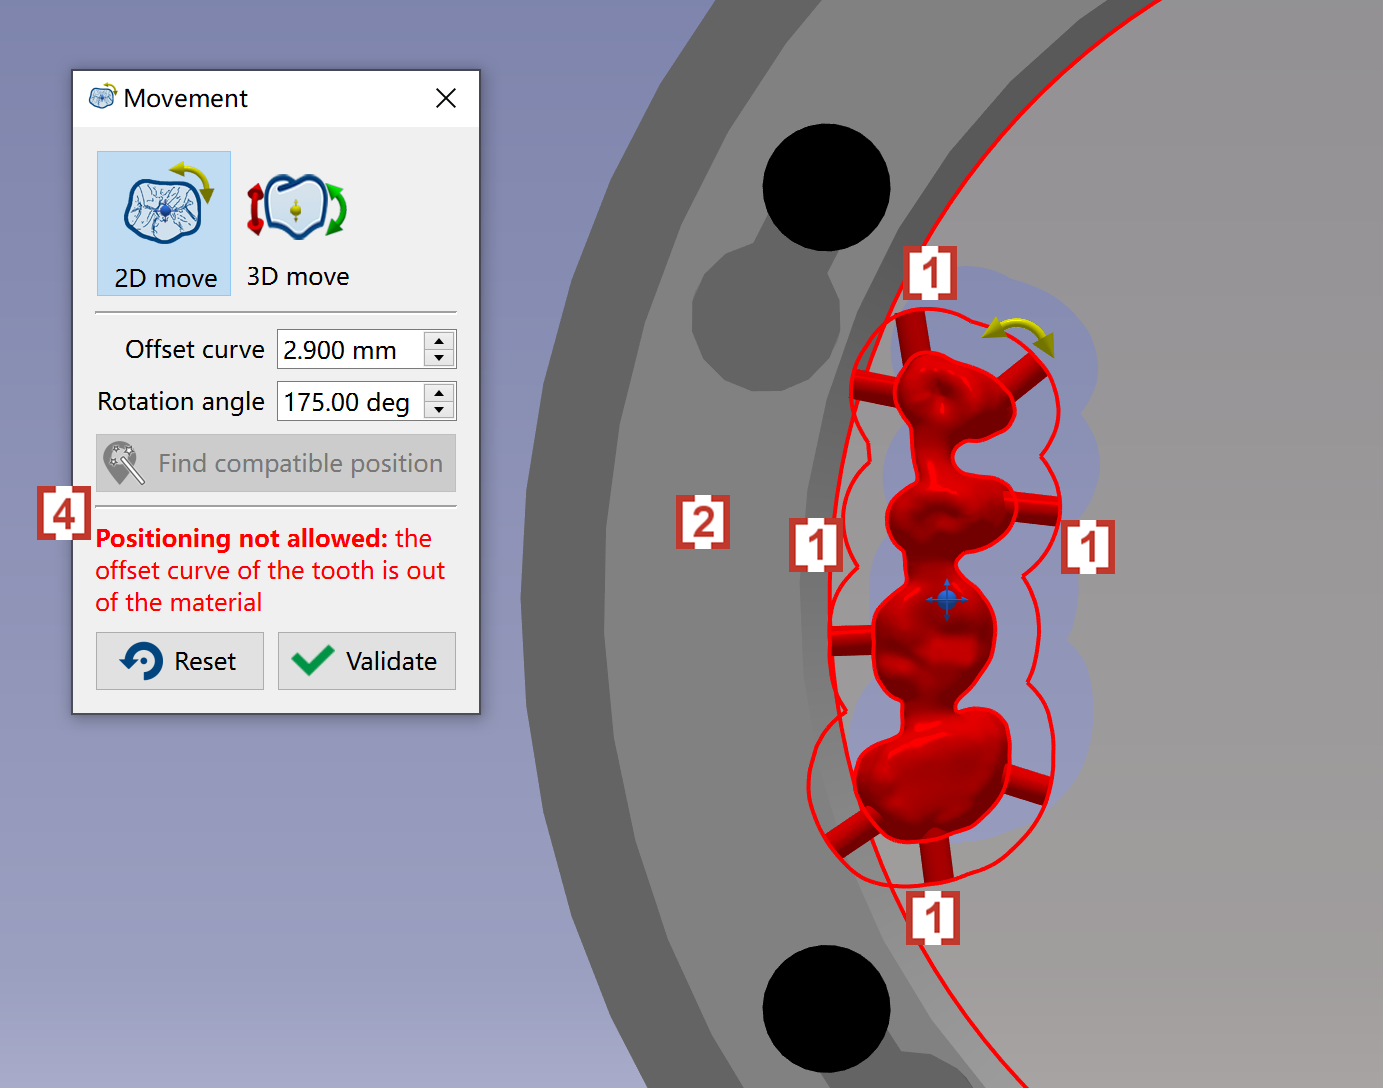
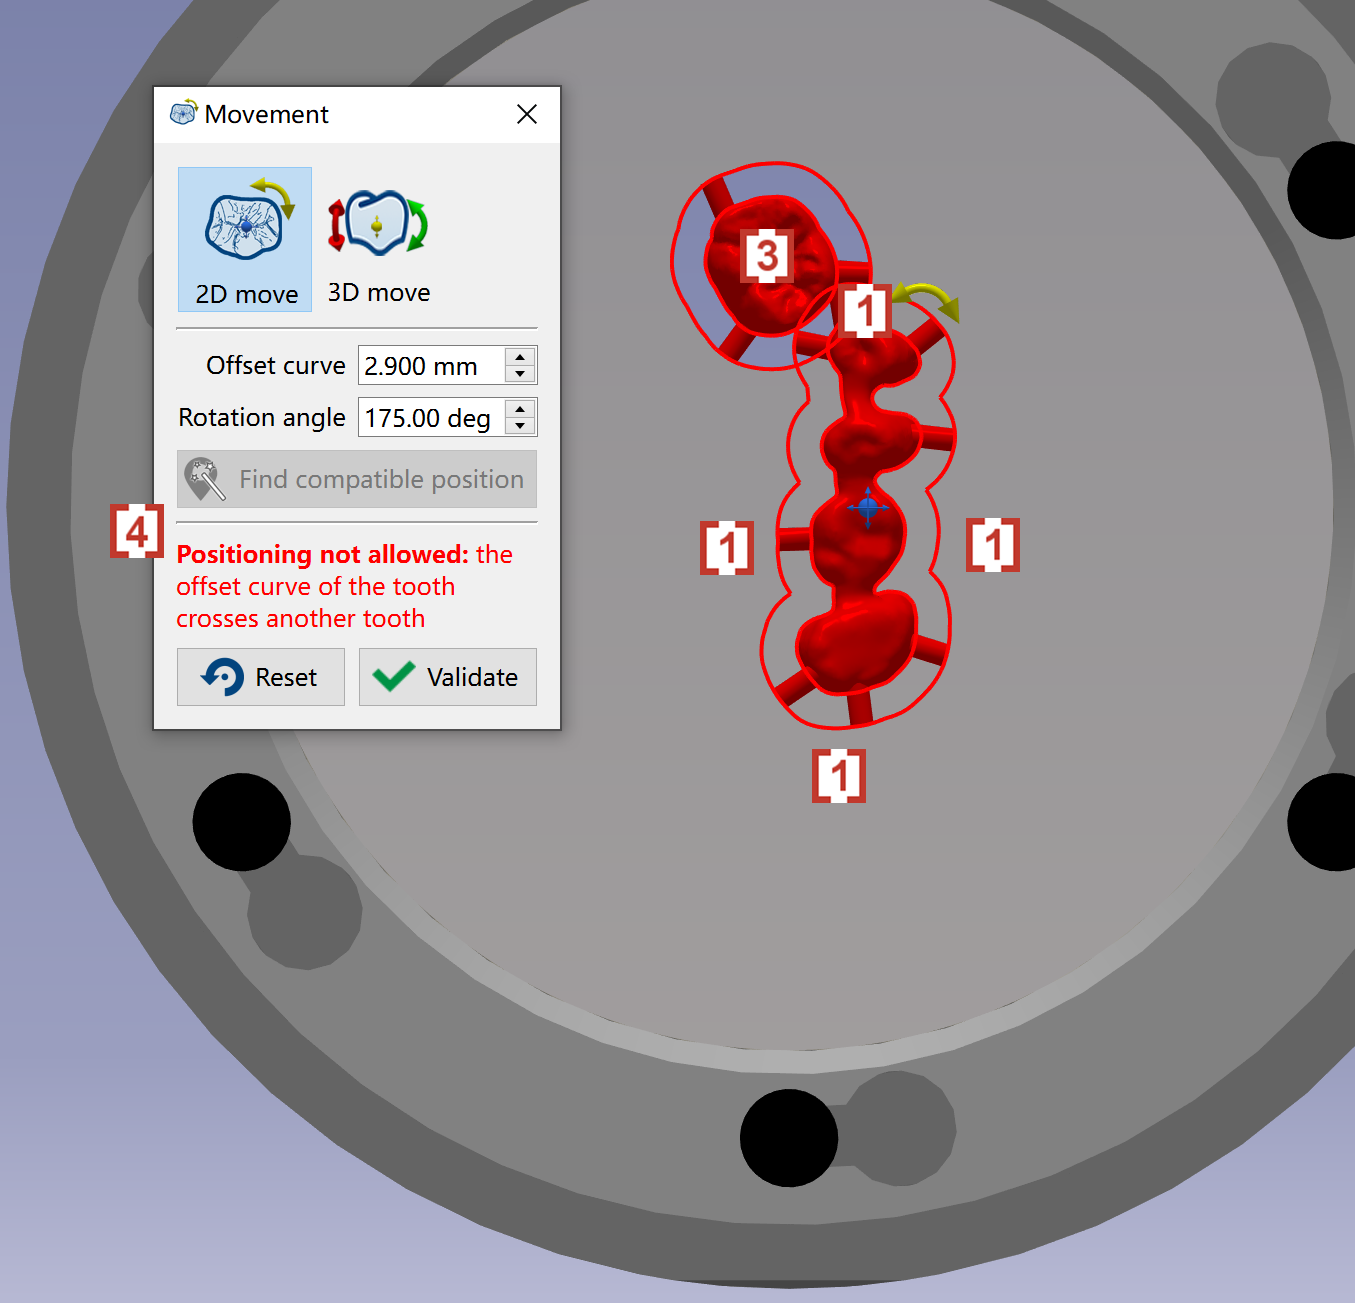
If we position the element’s offset curve [1] to touch the clamping system [2], or to touch another element [3], we will get warning message in red [4]. We need to reposition the element until the warning message disappear. |
|